Make a Dyed Beaded Necklace using wooden Beads marbled from Shibori
Today, I am excited to show you how you can use some or all of those gorgeously marbled beads left over from your Shibori textiles projects. Some dye artists like to toss those natural wooden beads, twine and yarn directly into the dye-bath for a solid indigo finish. I found that the beads bound inside of the Kumo, spiderweb like rings left behind a visually textured marbled surface. After, quite a few Shibori projects, I set those aside.
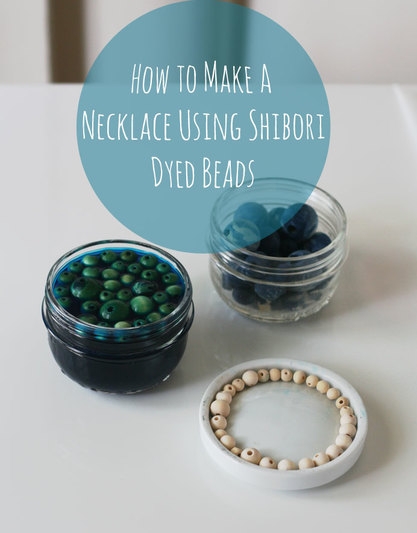
I have been saving the beads, and if you have tried any of my previous Shibori posts, then you should hopefully have some beads laying around your house. If you would like to experiment with dyeing the beads directly in dye, that is another possibility as you will see below.
If you'd like more info on Shibori textile dyeing please see my previous posts: 1. Learn the Basics of Shibori 2. Top 5 Shibori Textiles Tips 3. Three Shibori Techniques explained 4. Shibori Workshop Results revealed 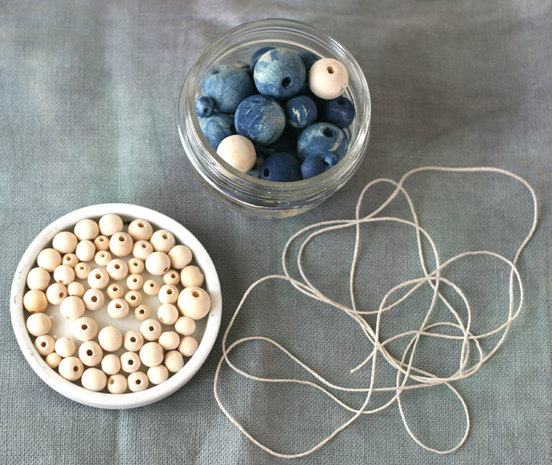
As pictured above, for this project you will need:
I had a large dye bath going that day, so I poured some of the turquoise dye into a glass jar to submerge the wooden beads and keep them separate from the rest. I even tossed an indigo marbled bead into the turquoise mix too! I let them soak for about 1 hr, while I worked with the Procion dyes. Then, I took the beads out to dry. Next, I was ready to start stringing the beads. 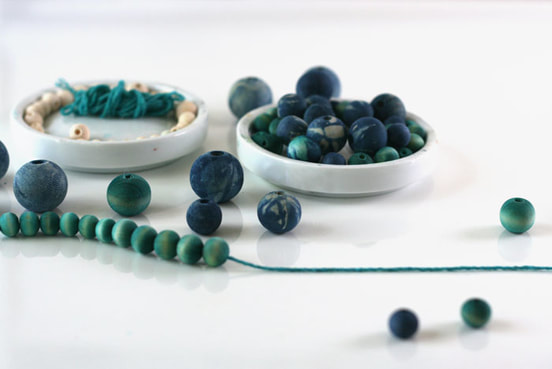
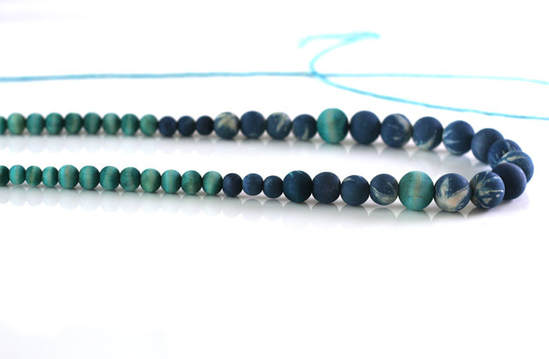
I designed the necklace loosely and spontaneously. I always keep beads in low trays or bowls to keep them from rolling away as I work. I counted out around 8 of the smallest, 8 mm beads in turquoise to begin. I threaded them onto the needle and slid them down to the end of the twine which I secured with a double knot at the end. Remember to leave extra thread or twine to tie off your necklace with a clasp later. I also think this project would work well with embroidery thread.
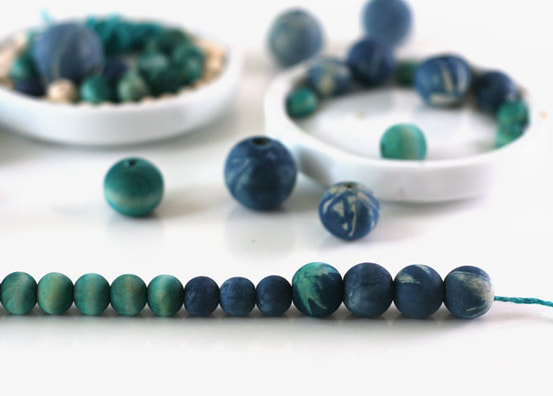
As you can see below, I used about 6-8 of the smaller turquoise beads to begin. I tend to avoid chunky statement necklaces, and I really liked the smaller beads the best!
I hope to make another long small beaded necklace in the future. I made the large marbled beads the center and focal point of the design. I was happy with the way it came out. Once you have finished you can use natural oils to seal each beads or Modge Podge for a glossier finish, I even discovered it comes in a spray!
Plus, if you have extra beads left over you can try out these cool DIY Curtain Ties that I created for my art studio curtains using the same pack of beads. I hope you have enjoyed seeing how-to create a marbled beaded necklace. I'd love to hear about your results, if you try it!
0 Comments
Leave a Reply. |

HI, I'M HILARY.
This is where I share inspiration for creative well living & following your dreams. With a love to sustainable conscious creation. You will notice that I offer workshops that inspire you to LIVE a soul-inspired life and manifest your dreams. I hope to meet you at one of my retreats or inside one of my group programs. I truly believe in the power of community and connecting with visionary femme creatives like you! For weekly inspiration -find me on YouTube 


Categories
All
FAVORITES
Archives
September 2023

BLOG COURTESY:
All layouts on this blog are created solely for, A Day in the Life. I enjoy sharing information and love when others enjoy my ideas enough to post the links on their own sites. I simply ask that you credit photos and link back to all original posts. Any comments that are inappropriate or spam will be deleted. All other rights reserved. |


 RSS Feed