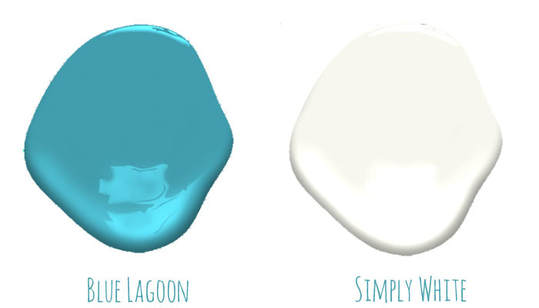
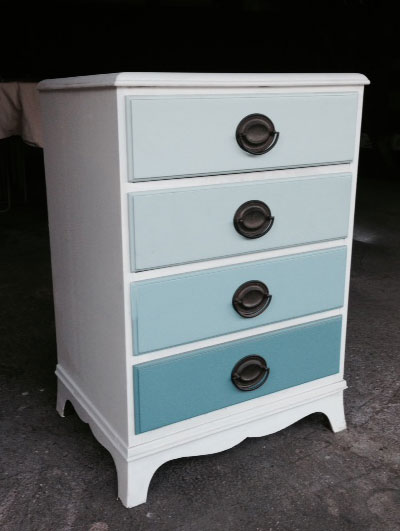
Painting Ombre in Blue Lagoon: NIGHTSTAND DIY
Today, I decided to pop-in with a quick DIY for you to try out. I resurfaced an ombre nightstand, a few years ago and it came out wonderfully, so I thought I would share it. As you know, I love all shades of turquoise and blue. This is a fun project for an afternoon that easily updates older wooden pieces. I came across this little nightstand at a thrift store, and I noticed that it was in good overall condition. I look for pieces with no wobbles and drawers that slide easily.
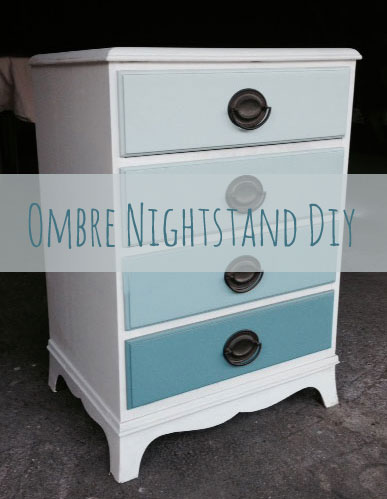
I remember when the ombre trend first emerged and it spread to everything from hair to fashion to furnishings! I knew that it was something that I wanted to try out. Even today, I like the timelessness of the piece.
When designing a piece of ombre furniture, I always look for a piece with 4 drawers or more, so that I can fade and lighten the hue as work from the bottom to the top. I also look for all wood pieces. Over the years, I realized that painted laminate nicks and scratches easily, so now I only use pieces that are completely solid wood. For this project you will need:
Directions:
I hope that this blue lagoon nightstand has inspired you to renew something that you may already own or to hunt for a vintage piece of furniture to redo.
If you liked seeing this piece, want more details, or are ready to tackle a bigger project, check out my Coral Ombre Dresser that I renewed too. If you are an artist or would like to receive monthly DIY projects emailed directly to your inbox, please join my mailing list below!
0 Comments
How-to Refinish a Vintage DeskToday, I am excited to share final pictures from the vintage desk restoration.You might have followed or read the previous post, where I shared my tips and strategies for refinishing hardwood. Today, you will see the before and after pics finally! You may remember that I started this project way back in the New Year. As I began, it quickly brought me back to all the before and after projects that I have tackled over the years. Here is a peek of how it looked by the pool, as the finishes were drying. For the finish, I applied a dark walnut stain. 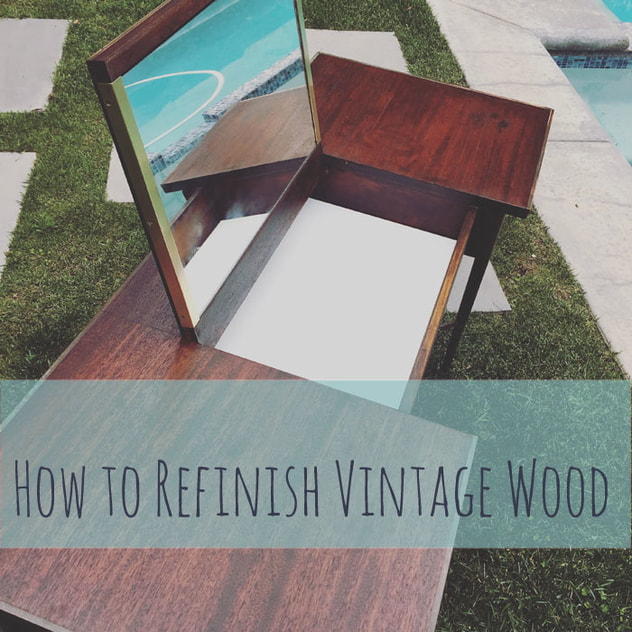 Continue reading to see how it looked before the initial process of getting it all sanded down.
|

HI, I'M HILARY.
This is where I share inspiration for creative well living & following your dreams. With a love to sustainable conscious creation. You will notice that I offer workshops that inspire you to LIVE a soul-inspired life and manifest your dreams. I hope to meet you at one of my retreats or inside one of my group programs. I truly believe in the power of community and connecting with visionary femme creatives like you! For weekly inspiration -find me on YouTube 


Categories
All
FAVORITES
Archives
September 2023

BLOG COURTESY:
All layouts on this blog are created solely for, A Day in the Life. I enjoy sharing information and love when others enjoy my ideas enough to post the links on their own sites. I simply ask that you credit photos and link back to all original posts. Any comments that are inappropriate or spam will be deleted. All other rights reserved. |


 RSS Feed