Upcycle a Used Canvas witH Gesso tutorialI have some inspiring art-related posts coming up soon and it got me thinking about the work coming out of my studio these days. This month, I plan to work on some improvisational paintings on paper and wood. It's this idea that has me feeling excited. It all started with a modern painting that I made for the Minted x West Elm design challenge. It was freeing to create something expressive and loose for a change. Have you ever felt overly attached to the outcome of an art project?  Photo by Tim Arterbury via Unsplash To move past that initial hesitation, I decided to recycle some used canvases that I had lying around my studio. In a way, I feel less attached to a recycled canvas than a brand new canvas or a blank sheet of paper. To prepare each canvas, I needed to resurface them with gesso. Here's how you can gesso a canvas and start a fresh painting. 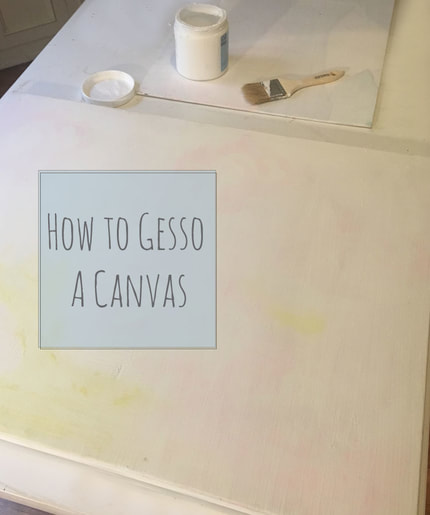 For the full details, read on!
0 Comments
Wood Table Glue-up Repair
Today, I invite you to see how I repair simple slab of petrified wood in my studio. If you are interested in wood glue-ups or need to do a simple wood repair, then you can use this simple process.
This wood slab came from a high-end side table that my client purchased a few years back. When she reached out to me, I offered to repair the piece of furniture. 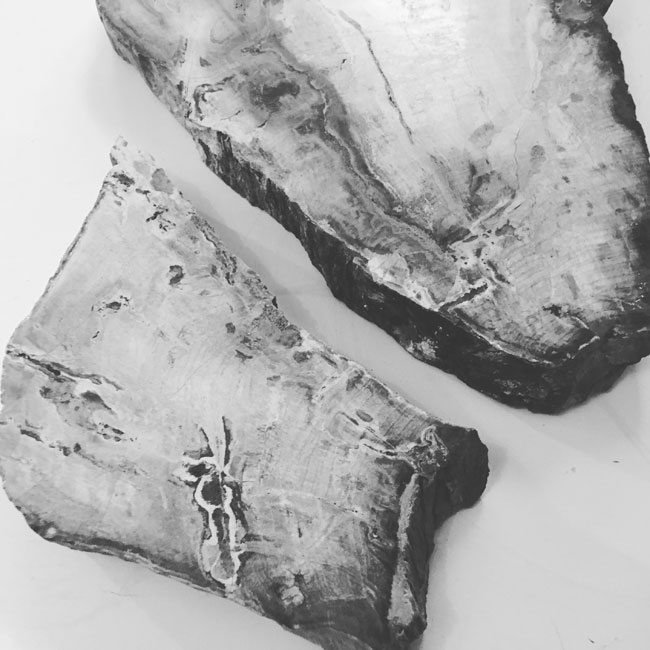
photo via Instagram
I was excited about this repair because the table was so beautiful and I felt like it could be repaired. I do occasional glue-ups when making a table top or even a large cutting board and I use a similar process to combine the two lengths of wood. In my woodworking class, I learned that wood glue dries stronger than nails. I use Titebond III for glue-ups because it is water resistant, which is perfect for both tabletops and cutting boards, anything that you want to resist moisture.
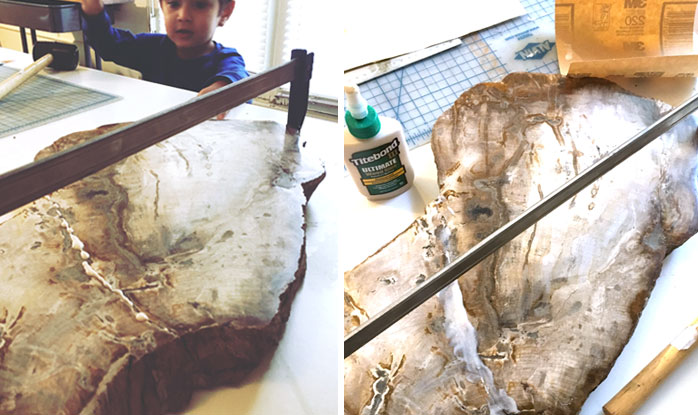
I use my 24" bar clamp a lot because most chairs and small tables fit within that size. The next size up, which comes in handy is the 36" bar clamp. I got lucky with this glue-up and was able to position the sides of the clamp on two semi-flat sections on the side of the table. I've found that it can be tricky, when glueing to natural edges and it helps if you can find 2 flat spaces on the edge which to clamp onto. After I run glue along both edges of the wood, I position the wood and tighten my clamp.
Once the wood glue had dried, I used a little bit of walnut wood putty with a putty knife to the crack to make it blend into the rest of the table. The crack is still slightly noticeable but gets lost in the style of the piece. I also sanded the wood putty filler once it was dry. Next, I used a multi-purpose adhesive to adhere the table top to the metal base. It works well and I use this product often when attached wood to metal or glass to wood. Then, I sand away the excess putty.
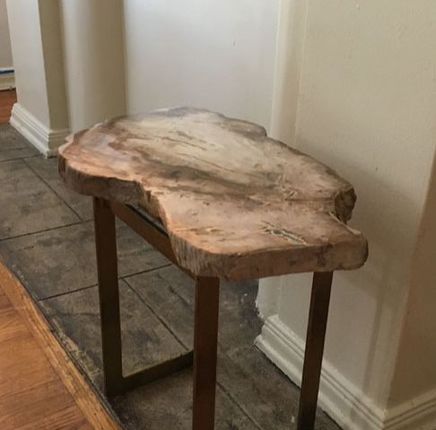
Below, you can see the side table after repairs. I plan to add a light coat of polyurethane to seal in the wood putty and ultimately seal the crack. I hope you have enjoyed this mid-week project and that this info will help you with any simple wood repair. 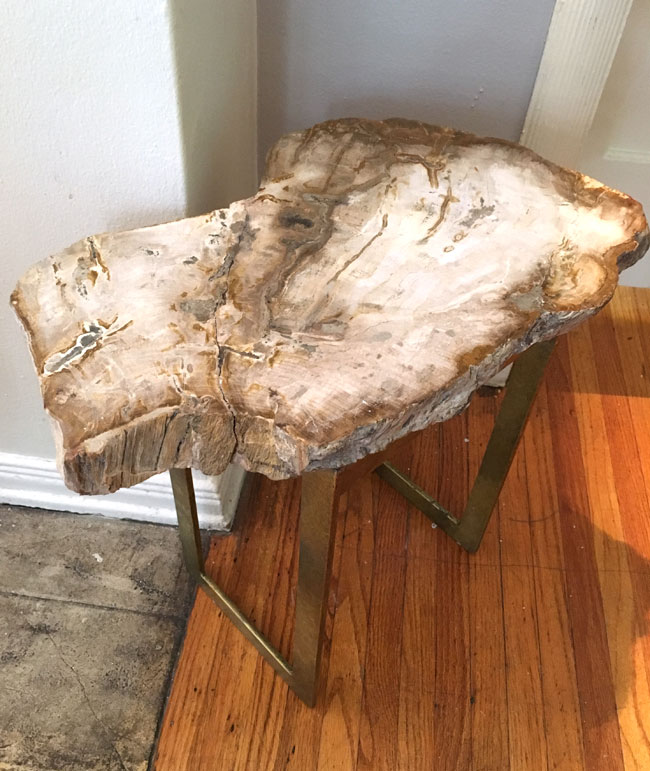
If you enjoyed learning about this simple wood repairs, then you might like to see how I refinished a vintage desk recently and you can too! To see more, repairs and tricks on wood refinishing please join my mailing list to receive monthly updates on how you can improve your home.
How to Create an Ombre Dresser in Guava By Benjamin MooreWho is ready to see how to transform a funky old dresser using various tints of a coral ombre? I thought I would share a painted furniture technique that I have tried many times in the past. You will see how I created a custom ombre look on a vintage dresser. Over the years, I have resurfaced several pieces of vintage furniture. This was one of my favorite projects to date. For the ombre effect, I like using color families of blue, gray or coral. For this project, my customer in Louisiana chose the the color Guava by Benjamin Moore. Here is how the dresser looked before in green. It was super funky (yet charming?) but needed and update for the space. I look for sturdy wooden pieces without a lot of wear and tear, that are preferably light-weight for shipping. 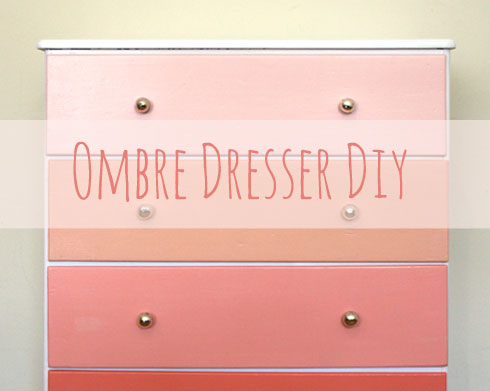 Ombre Refinishing SuppliesFor this project you will need:
Ready, Set, Sand!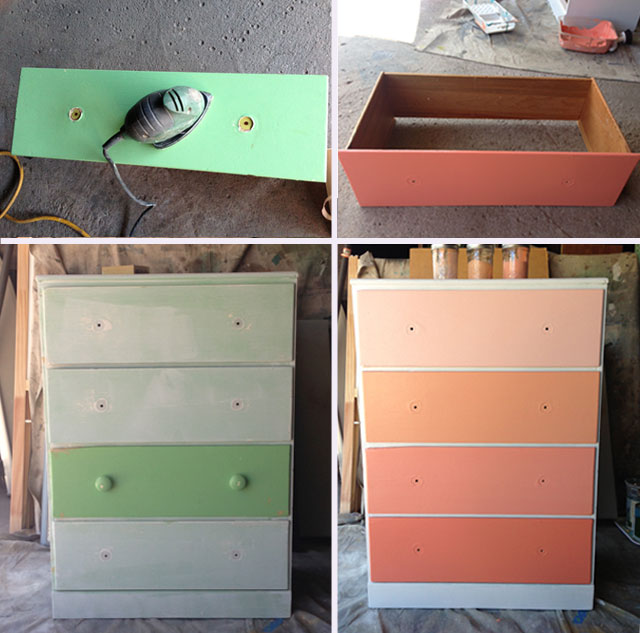 Follow these 6 steps to refinish your Dresser1. Sanding: Sanding and removing extra paint, dents and scratches. I sand to remove any imperfections in the wood by starting with 120 medium grit sandpaper. Next, I fill-in dents with a wood filler before I prime the old surface. 2. Repairs: I had to repair the bottom of a damaged drawer by having new piece of masonite cut to fit and securing it with wood glue and my hand stapler. 3. Priming: I prime the dresser using white primer to cover the original green shade. I use a smooth 4" foam cabinet roller for priming and painting. 4. Color Mixing: Now, I am ready to mix the paint. I begin by painting the bottom drawer with the original (darkest shade). We chose Guava by BM in semi-gloss for the darkest shade. I use semi-gloss for almost all of my painted furniture pieces because it resists scratches and wipes down easily. 5. Color Mixing/Painting: You can see the colors lightest to darkest (at right). I hand-mix the peachy colors and by adding white paint. I always store excess paint for touch-ups later. I have painted several other ombre pieces and I always find color matching at a later time can be difficult. 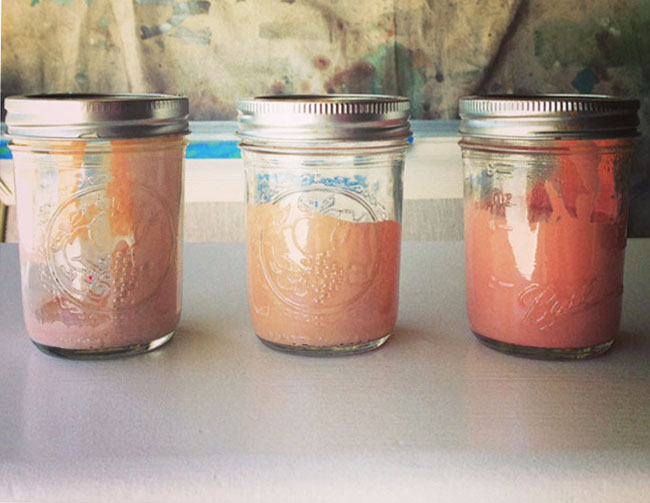 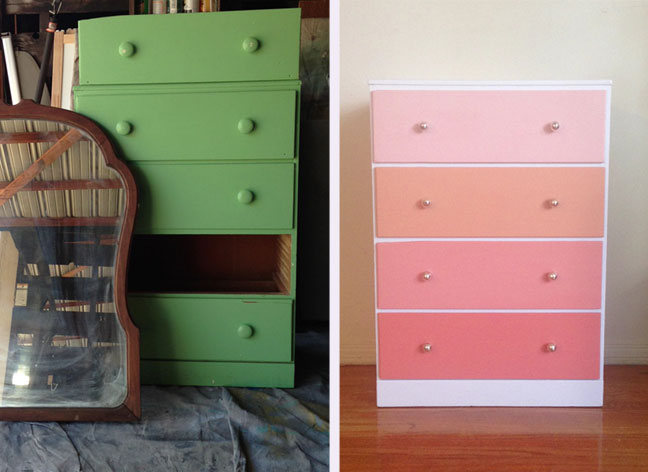 Last but not least, you will want to install the hardware. You will want to choose knobs that accent your space and add to the piece. For mine, I used small silver mercury glass knobs that I found on sale at Anthropologie. Here you can see the final look below! Later, I was commissioned to use this exact ombre scheme on a custom desk for a client. To my joy and surprise, a design publication based in Germany included this piece in it's editorial. 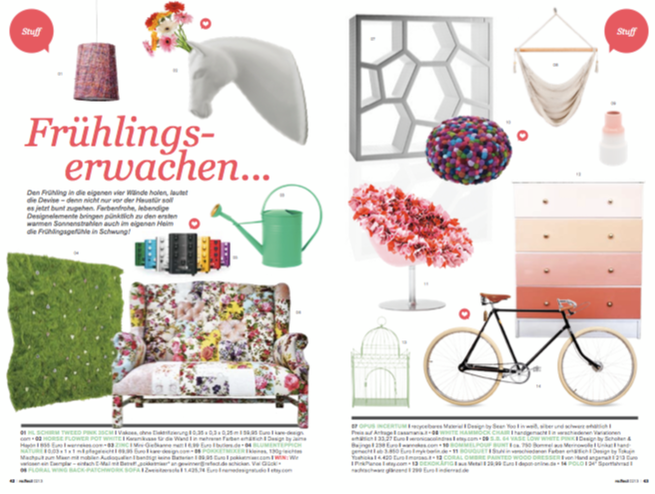 I hope you all have enjoyed hearing about how to paint an ombre dresser using interior paint! If you'd like to see more ombre, then be sure to check out this Ocean Ombre Nightstand in Blue Lagoon, and request to join my Group Board, Hooray for Ombre! While we are on the topic of furniture, I am currently loving this chic painted DIY nightstand video that I enjoyed by Orlando Soria and Emily Henderson. Would love to try this one out. How about you? Any plans to update furniture pieces soon? Please share! |

HI, I'M HILARY.
This is where I share inspiration for creative well living & following your dreams. With a love to sustainable conscious creation. You will notice that I offer workshops that inspire you to LIVE a soul-inspired life and manifest your dreams. I hope to meet you at one of my retreats or inside one of my group programs. I truly believe in the power of community and connecting with visionary femme creatives like you! For weekly inspiration -find me on YouTube 


Categories
All
FAVORITES
Archives
September 2023

BLOG COURTESY:
All layouts on this blog are created solely for, A Day in the Life. I enjoy sharing information and love when others enjoy my ideas enough to post the links on their own sites. I simply ask that you credit photos and link back to all original posts. Any comments that are inappropriate or spam will be deleted. All other rights reserved. |


 RSS Feed