5 Tips to style and organize your entrywayHave you ever wanted to tidy-up and reorganize your entryway? The entrance of your home really sets the tone for the entire space from the moment you first walk in the door. Our entryway, is currently a work in progress. We have tackled organizing the space, which I find is a really good place to start. We are still on the hunt for a fabulous piece of art to make it feel complete. Today, I am going to share with you some ideas about how you can make your entryway feel absolutely organized and perfect as you walk in the door. This is a space that I worked for a client, a few years back when we were designing her living space. Here are 5 simple steps to make your entryway more appealing as you walk in the door, so you can take a deep breath relax and enjoy your home more! 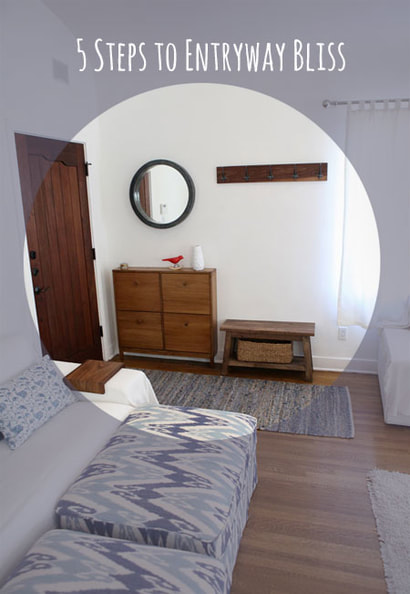 Remove all clutter and superfluous objectsI recommend that you start by removing unwanted objects and organizing clutter. Voila! You are already on your way to making your space functional and unique! 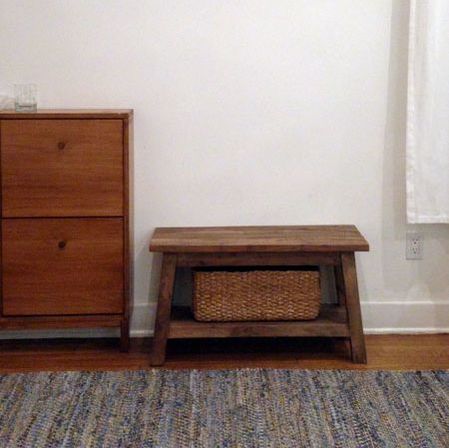 Follow these simple steps to get Organized Follow these simple steps to add function to your entryway. 1.Organize shoes with a storage cabinet, baskets or shoe rack. 2.Create wall storage with coat racks or hook to organize, hats, scarves, backpacks and bags. 3.Decorate walls by adding a mirror or floating shelves. It make the entryway feel larger and more inviting. 4. Address the floors, by adding carpet runner or doormat to keep floors clean plus add texture or color. We cozied up the wood floor with a long denim rug runner- like this one. 5. Accessorize with trays, bowls, and baskets. Bonus points, if you add a vase with fresh flowers. At the moment, personally like to use a woven storage bowl for keys. We added in a long basket below the bench too. I loved the challenge of organizing her entrance because it led me to design a range of walnut coat racks and floating mirrors. The walnut coat rack was designed around our need for a wooden piece that felt organic, modern and had a variety of tonal qualities. In this way, the coat rack pulled the other wood pieces, the bench and the shoe storage together for us. 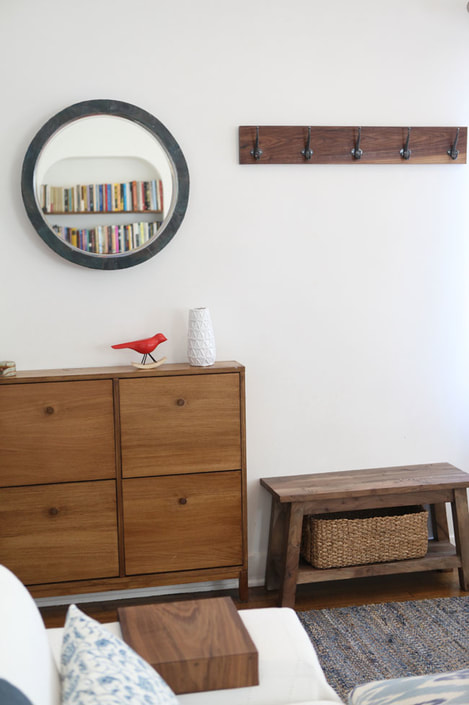 List of Sources for your spaceHere is the complete shopping list of the pieces that we used.
Below, you can see how the whole space came together with their front door and existing architecture. I promise to share how my own entryway redo is coming along very soon! 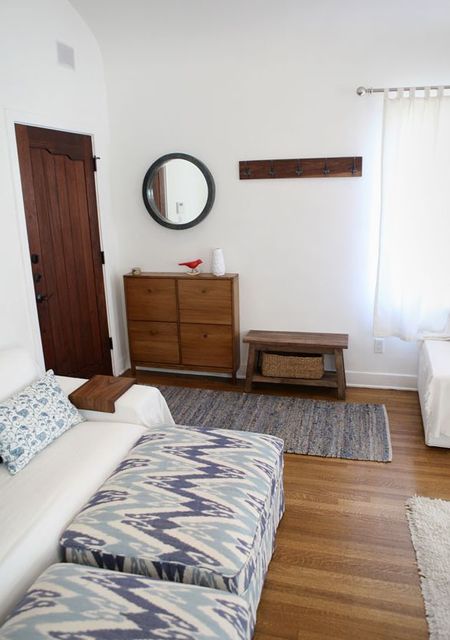 I hope you have enjoyed seeing how I organized her space. I'd love to hear from you. What are some of your favorite things to place in an entryway?
Please feel free share any tips or ask any question in the comments below! If you enjoyed this post, you might also enjoy following along the One Room Challenge with me, as I transform our spare bedroom into a Boy's Nature Bedroom over the course of 6-weeks.
0 Comments
3 Basic Shibori Techniques: Kumo, Arashi, ItajimeWould you like to learn more about Shibori? I bet you might already be familiar with some of the beautiful tie and dye patterns that you can achieve from rings to lines. Many of these gorgeous shape-resist patterns can be achieved in an afternoon at home. Today, I will share 3 amazing Shibori techniques that I highly recommend to enhance or begin your textile design practice. Whether you are just starting out or an experienced designer, I think that you will find these techniques beneficial. My favorite Shibori techniques to teach at workshops and in my Natural Dye e-course are Kumo, Arashi and Itajime. I learned about these through reading, lots of experimentation and practice. In this article, I will share my top 3 techniques pictured below with you. 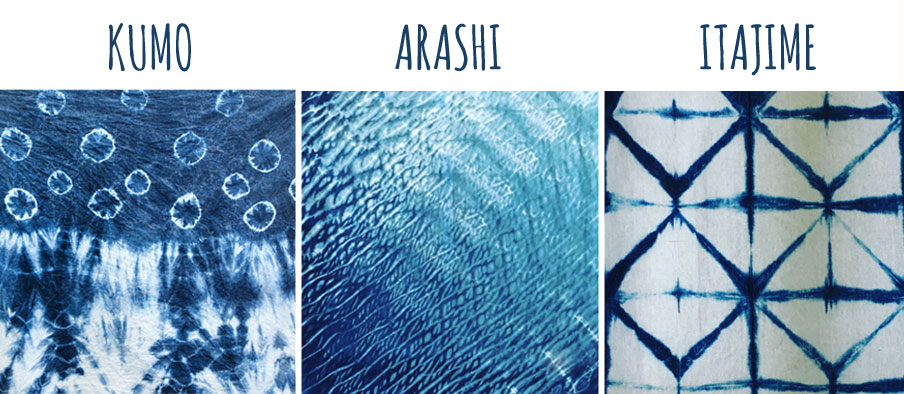 Kumo fabric (left) designed by Chris Alves. Arashi and Itajime fabrics (middle & right) designed by Hilary L Hahn. Before beginning, I gathered all of the supplies that I needed for this project, which included rubber bands, beads, twine and wooden geometric shapes. I will share a more detailed list of all supplies alongside each method and I now offer a free checklist, that you can download:) 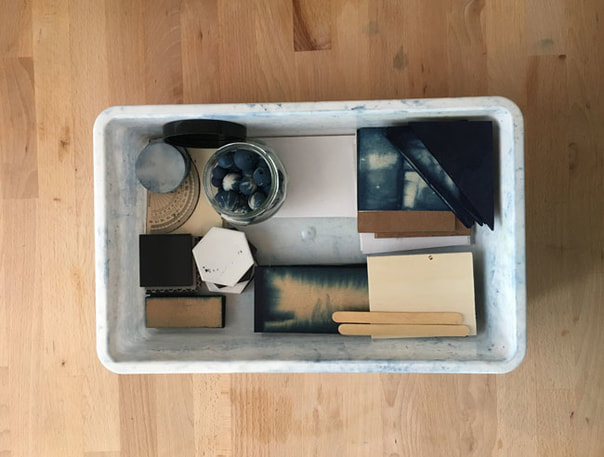 beads, wooden shapes and tiles It took me time and effort to pull together all of the supplies when I first started. Below, you can opt-in to receive my downloadable list of Shibori supplies! Kumo ShiborIYou are probably most familiar with Kumo Shibori, which means spider-web, and is a way to form a ring or a circle through binding. This technique comes to mind when thinking about colorful tie-dyed t-shirts, but it's origins are rooted in ancient Japan and India. Kumo is the practice of tying and binding found objects, which are often pebbles or stones. Below, you can see how Chris used wooden beads of various sizes to create uniform rings and circles on his tea towel. 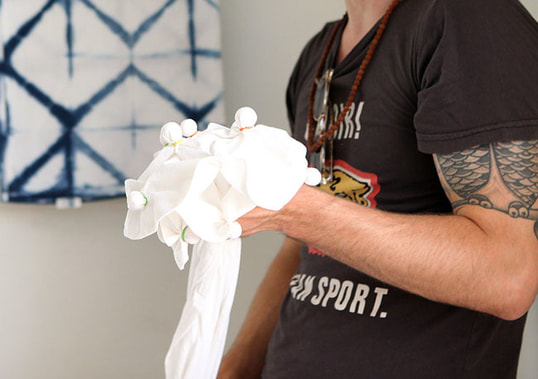 I suggest marking out your design with a pencil first and placing a dot where you would like center each bead. I wanted the circles on a grid for the matching t-shirts that I created for my son and his best friend. Next, I made concentric circles at random by tying two rubber bands, one inside the other leaving a narrow space in between. Kumo supplies:
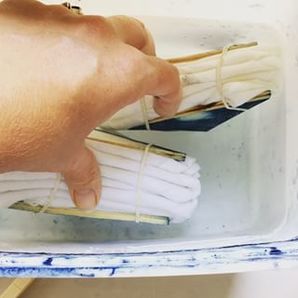
 Arashi ShiboriNext, up is Arashi, a pole dyeing technique. The word Arashi, means storm, and in this technique twine is used to create directional lines. This effect is achieved through wrapping fabric around a dowel or pole, securing it with twine, then dyeing it. For this method, a deeper vat or 3 gallon bucket works well and the fabric can also be scrunched up toward the end of the pole. Below, you can see a pair of white pants, which are wrapped around a dowel. When I submerge the pole, I tend to scrunch the fabric toward one end of the pole. I was amazed at the Shibori results on a silk pocket square that I dyed for my husband's trip to Peru. 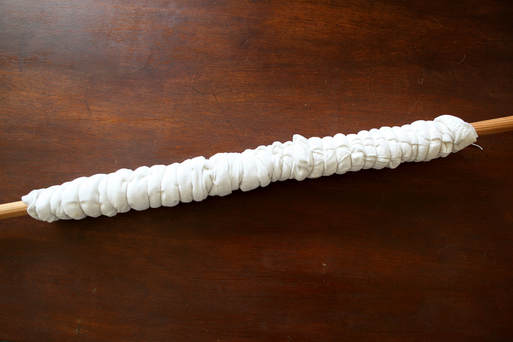 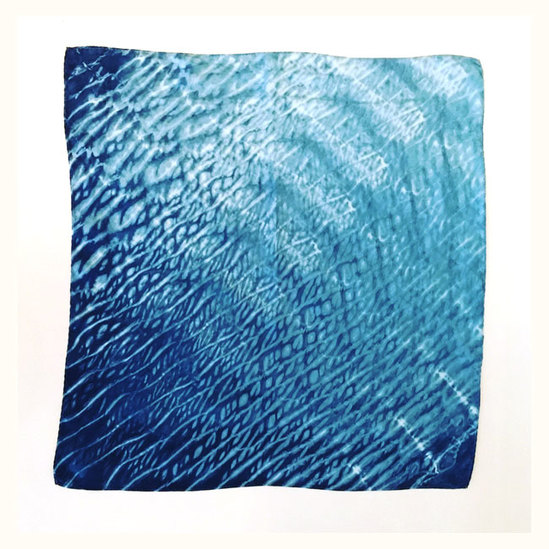 Silk pocket square created using Arashi Shibori Arashi supplies:
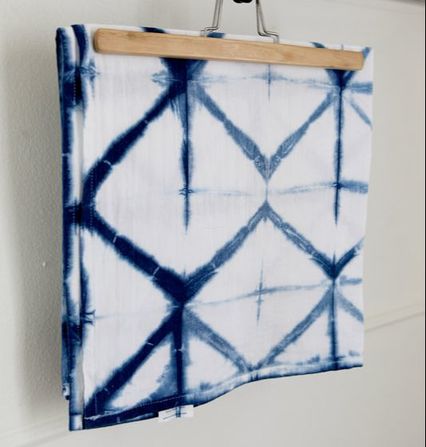
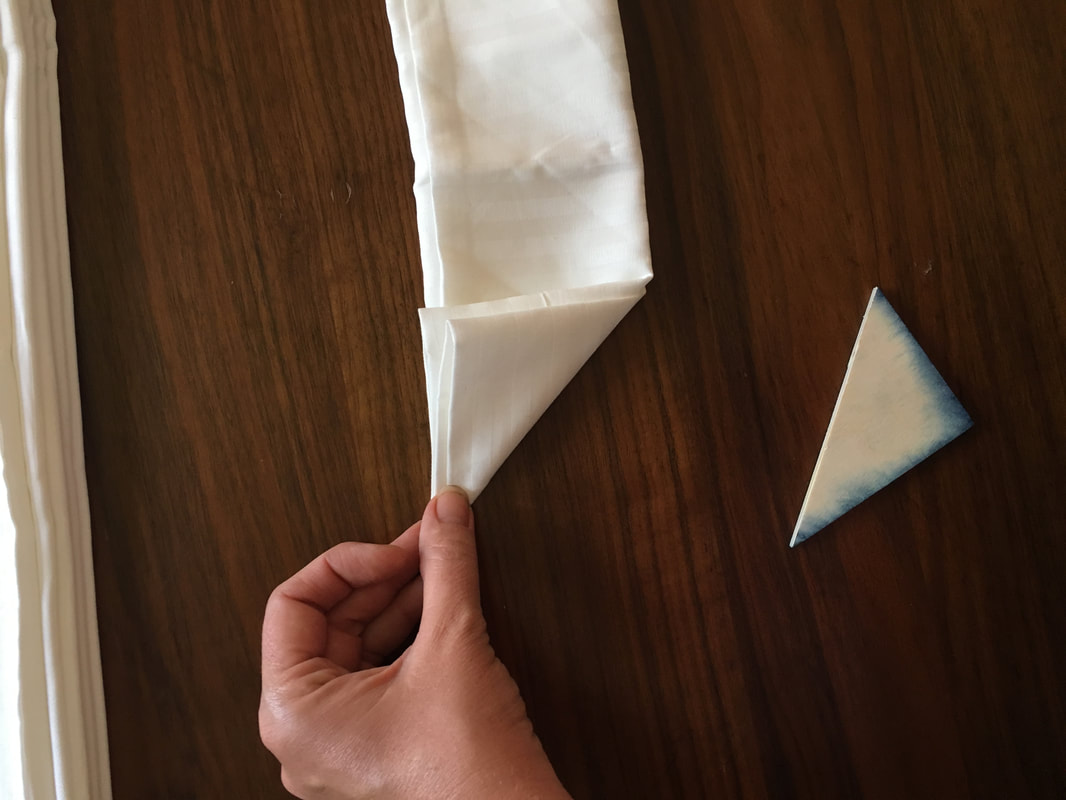
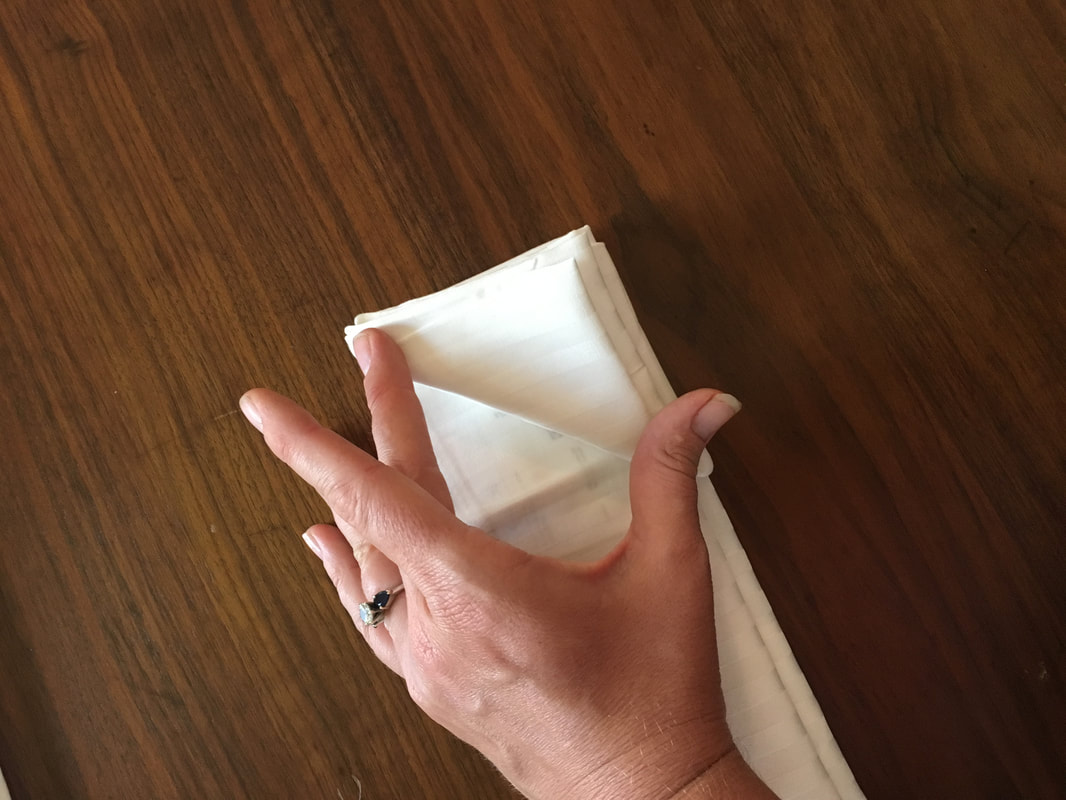
Itajime ShiboriA 3rd method is Itajime Shibori, using various folds to pleat the fabric then securing it with shapes. Then shapes are applied to resist the dye leaving the space where the shape is placed in white. Shapes can be cut from a variety of materials including wood, cardboard and plexiglas. In the first example, you will see how I folded the fabric, using a basic accordion fold shown here, to make it long and narrow, then I folded a right triangle back and forth. Once it was all folded up, I clamp it using 2 wooden triangles and secure it with rubber bands. Please note: I cut these triangles by cutting a rectangle (or square) diagonally in half to form 2 right triangles with 30 and 60 degree angles. Itajime supplies:
 For the fabric below, I did the same long accordion fold then clamped the individual squares with a rectangular shape. This allowed more of the fabric to be exposed to the indigo dye, thus more of the fabric became a deep blue, leaving only the rectangle pattern in white. 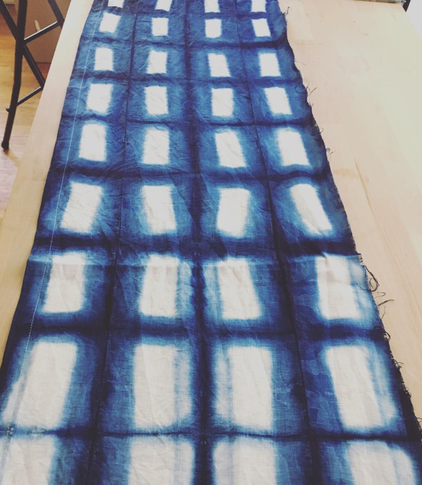 Shibori Resources
Shibori Workshop Recap
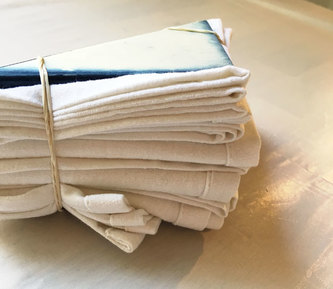
Last Sunday, I hosted our first Summer Workshop in a series and I can't wait for you to see everyone's awesome results! Our small group of participants created a collection of beautiful and original textiles for their homes. I provided 2 tea towels and guests brought in additional items to dye.
The 3 hour workshop began with a short lesson on Shibori folding techniques and culminated in a creative burst of energy! 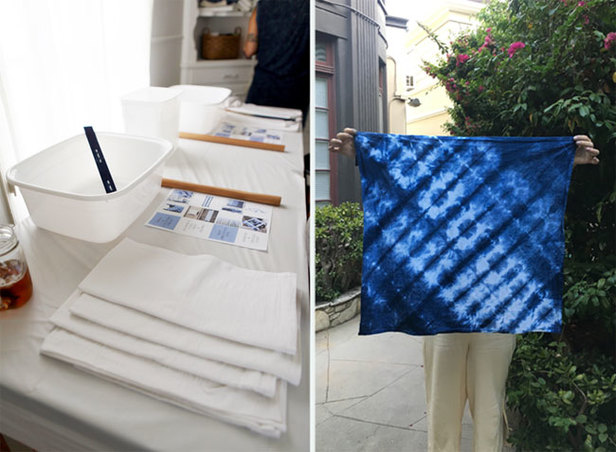
(left) photo by Amelia Tabullo photography, (right) photo by Hilary L Hahn via Instagram
Lucky for us, the Sunday afternoon was memorable and inspiring. Read on below to see the event pics, learn more about the process and all the stunning results!
|

HI, I'M HILARY.
This is where I share inspiration for creative well living & following your dreams. With a love to sustainable conscious creation. You will notice that I offer workshops that inspire you to LIVE a soul-inspired life and manifest your dreams. I hope to meet you at one of my retreats or inside one of my group programs. I truly believe in the power of community and connecting with visionary femme creatives like you! For weekly inspiration -find me on YouTube 


Categories
All
FAVORITES
Archives
September 2023

BLOG COURTESY:
All layouts on this blog are created solely for, A Day in the Life. I enjoy sharing information and love when others enjoy my ideas enough to post the links on their own sites. I simply ask that you credit photos and link back to all original posts. Any comments that are inappropriate or spam will be deleted. All other rights reserved. |


 RSS Feed