How To Create Beautiful Shibori Textiles Using indigo DyeI have long been a fan of Indigo dyes ever since our first trip to Rajasthan in 2007, when the deep blue indigo hue caught my eye. I noticed Shibori designs trending in interiors and diy. Ever since, I have always wanted to give Shibori folding and tying techniques a try. Initially, I found the final pictures intimidating because the fabrics always looked visually stunning, which led me to believe that the process was complex. I found out the process can be simplified and even a beginner can have beautiful results. The beauty and simplicity of the outcomes are both modern and timeless. The overall project took me 2 hours from start to finish, although I planned this project for about 1 week in advance. Much of the work was planning and ordering the materials at the beginning of the week. Once I had them all together, I was ready to begin. 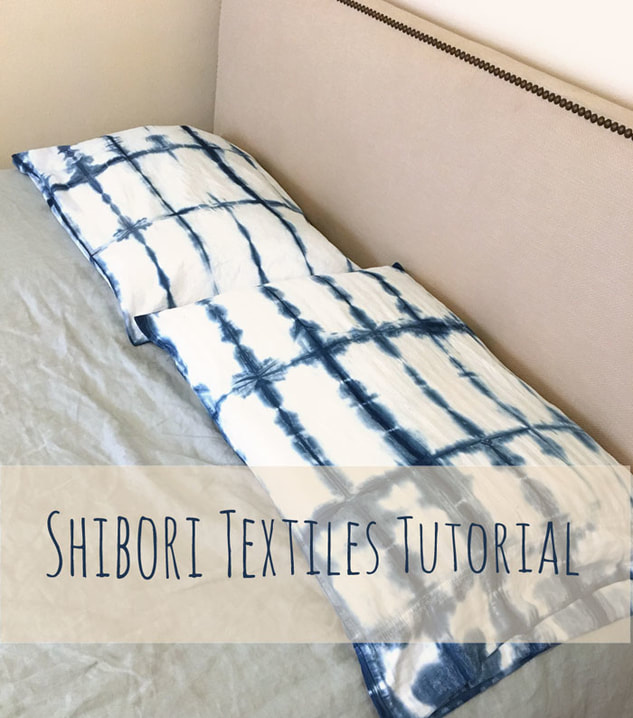  Rubber bands, folded pillowcases, tea towels, indigo kit and clamps. You will want to gather all of your supplies in advance. Read on to see the project photos and fabrics that I suggest! Also be sure to can grab your free Shibori shopping list below. Favorite Shibori Supplies and Materials for BEGINNERsI found some basic items to experiment with around the house: green rubber bands, leftover tea towels, cardboard, and fabric remnants. Here is what I purchased for this project:
For the fabric pieces that I wanted to dye, I used mostly all cotton items that I had around the house, I only bought one new kids t-shirt for this project. Later, I found the perfect linen tea towels for dyeing! Fabric suggestions:
All of the pieces, I had prepared throughout the week by folding and soaking the fabric in water in advance. I spent about 1-hour folding the pieces in advance. I tied off the 2 cotton toddler t-shirts, one for my son and one for a neighbor. For the design, I used a ruler to make a grid. I wanted the rings to be strategically placed and to be relatively small. I saw many tips that said to use beads, I found many small round, plastic and glass beads that I used. I randomly created a double ring in 1-2 times on each piece. Later, I ordered the natural wooden beads listed above. 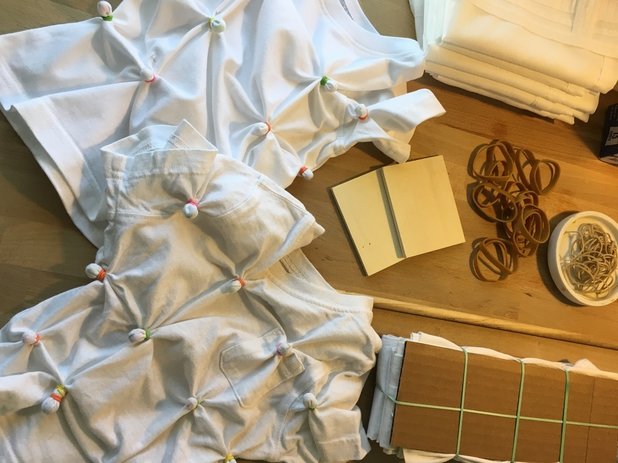 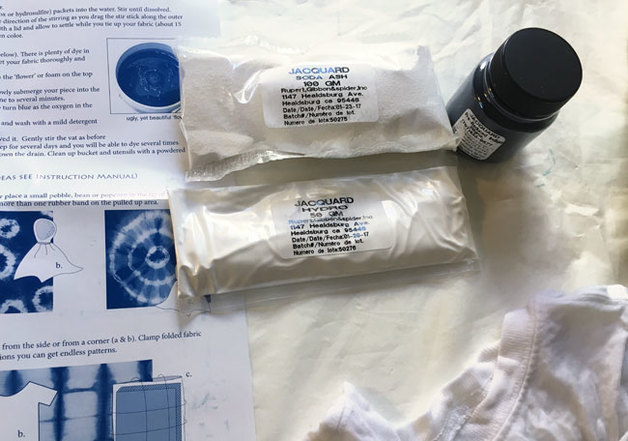 Indigo dye, Soda Ash and Hydro powders Originally, I had planned to use a 5 gallon bucket, instead I opted for a low wide plastic container along with a deeper vertical one that I had in my studio. Next, I split the contents of the indigo dye, soda ash and hydro packets into the two vats filled with warm water and followed the Indigo Dye kit instructions. 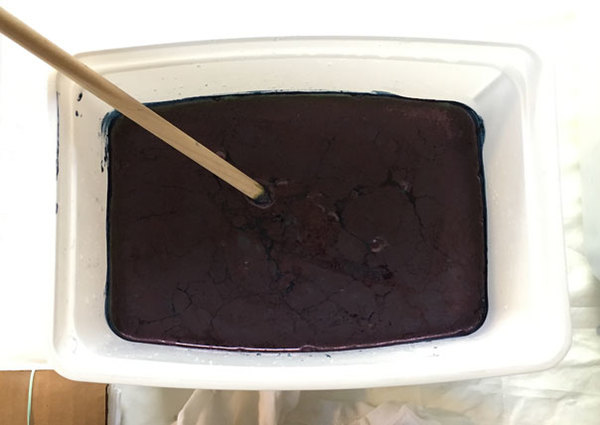 I stirred using a wooden dowel in a slow clockwise direction. About 15-20 minutes later, the dye was ready to go! (Tip: I used the gloves that came with kit, but I think longer gloves, would be ideal for this type of project. 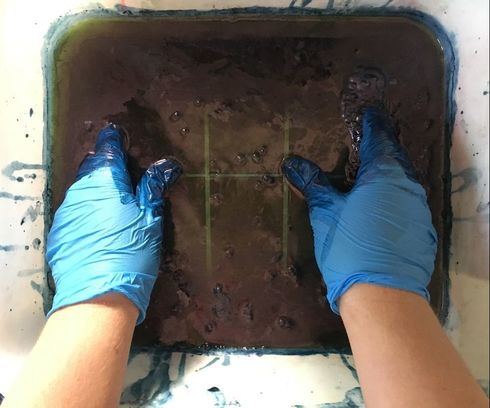 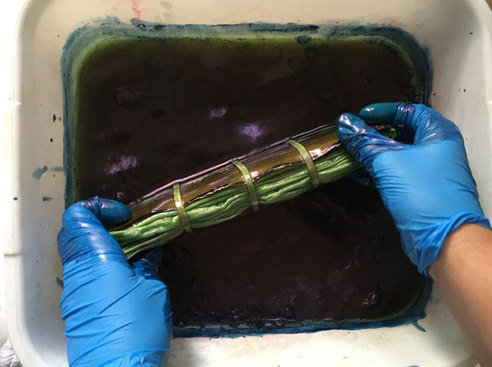 Manipulate the fabric to allow the dye to touch the places you want it to go. I submerged all of the pieces in the dye bath and then rung the excess water out. Some of the pieces, including the shirts, I dipped again and allowed it to remain in the bath about 5-7 minutes. I decided not to double dip the 2 pillow cases to experiment with a faded look. 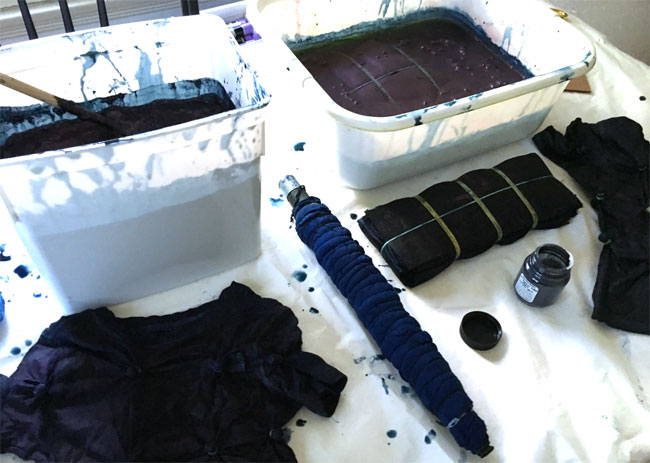 Rinse, Cut and Untie.Next, I took them over to the sink to rinse them out. The process of untying the pieces to reveal the white marks was the biggest thrill. The artistry of the folding influences the piece as it unfolds to reveal it's marvelous markings. 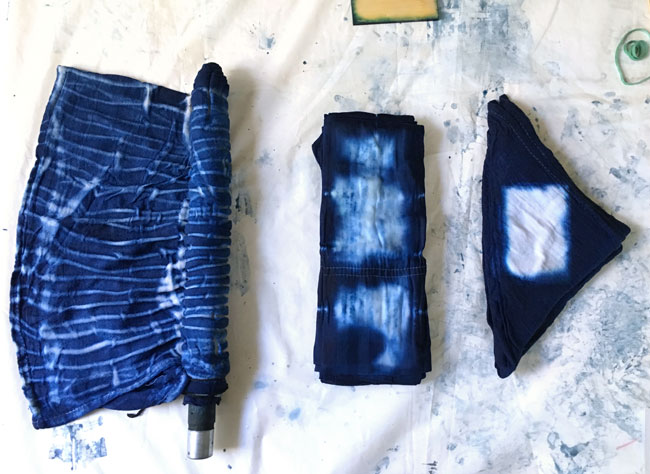 1. Twine tied. 2. Rectangular fold with rubber bands 3. Triangle fold with wood board and pressure clamp Below at left, you can see a tea towel wrapped around a 1-inch thick wooden dowel tied with twine, bunched and secured. The result at right, is both predictable and surprising! I had anticipated thin wavy lines from the twine, yet the exact pattern and direction is more spontaneous. 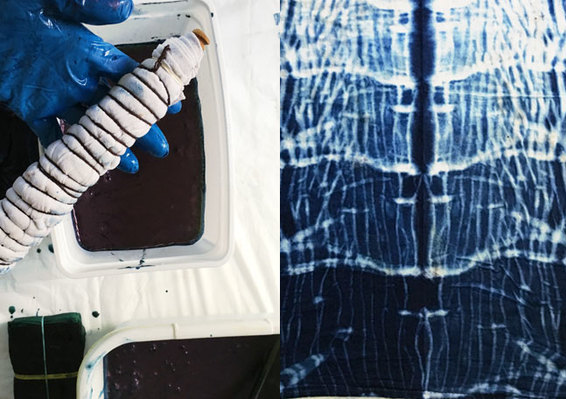 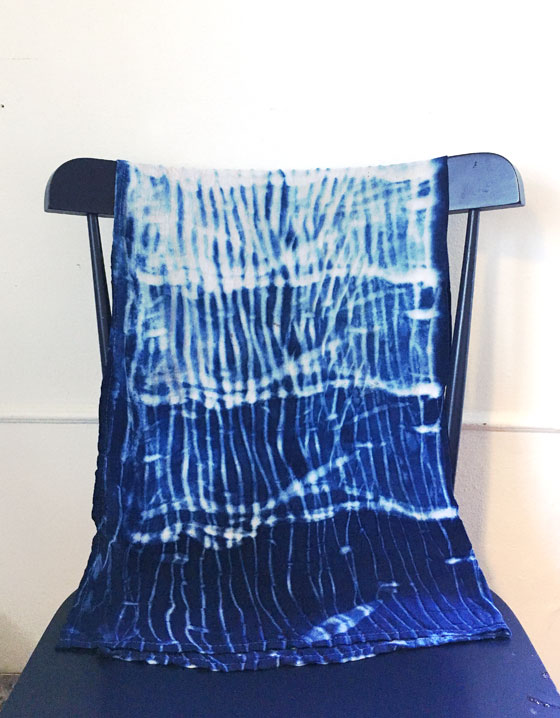 Wavy lines from the twine wrapped around the dowel on a tea towel.  Long Rectangles formed by using cardboard with rubber bands on a pillowcase. 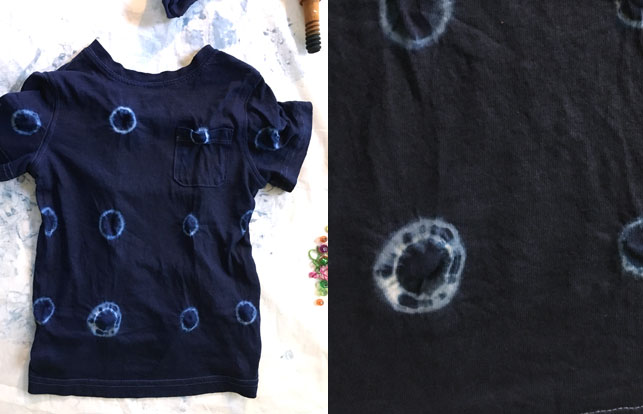 Tie-dye rings with rubber bands and a double ring. Here is part a peak of the textile collection from my latest workshop, after the tea towels were all rinsed out and hung to line-dry! I promise to share with you future Shibori DIY. Until then, Happy Monday and happy folding! 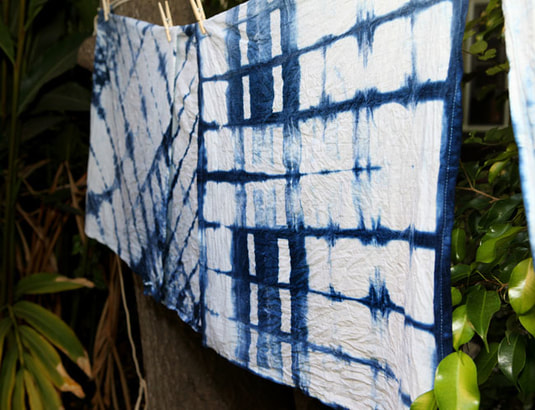 Original photo by Amelia Tabullo photography for A Day in the Life
5 Comments
Stella
2/9/2018 04:42:10 am
Hi am very much interested in knowing more about your shibori design tutorial. it really intrigued my mind 2/9/2018 09:55:10 am
Hi Stella,
Dylan
5/10/2018 08:37:01 am
Please let me know when you are doing the next shibori workshop 10/6/2020 06:02:03 pm
Hi Dylan, We will have an Indigo Shibori night in November 2020. Please make sure you are on our list, to receive updates. 5/11/2018 06:54:52 pm
Hi Dylan:) I will certainly let you know about my next workshop! I do have some availability for a small group lesson or semi-private in early June, if you are interested. Let me know:) Congrats on your blog! Leave a Reply. |

HI, I'M HILARY.
This is where I share inspiration for creative well living & following your dreams. With a love to sustainable conscious creation. You will notice that I offer workshops that inspire you to LIVE a soul-inspired life and manifest your dreams. I hope to meet you at one of my retreats or inside one of my group programs. I truly believe in the power of community and connecting with visionary femme creatives like you! For weekly inspiration -find me on YouTube 


Categories
All
FAVORITES
Archives
September 2023

BLOG COURTESY:
All layouts on this blog are created solely for, A Day in the Life. I enjoy sharing information and love when others enjoy my ideas enough to post the links on their own sites. I simply ask that you credit photos and link back to all original posts. Any comments that are inappropriate or spam will be deleted. All other rights reserved. |


 RSS Feed