California Eclectic Master Bedroom: WEEK 4 (AND 3!)I can't believe that it is already Week 4 of the One Room Challenge. I am wondering how I am going to pull this room all together! I am focusing on all of the little details, and narrowing my scope. The biggest furniture change will be the custom floating nightstands, which I am DIYing (is that even a word?!) I will be assembling and installing the nightstands over the weekend. Be sure to watch my Insta stories on Sunday to see how that goes! I needed to find something that would be the perfect balance to our modern wooden platform bed. I love this bed, and it is something that I enjoy looking at and sleeping in every day. It is fairly new as we purchased this year. I knew that I wanted the nightstands to feature some storage, be minimal and light architecturally so as to not compete with the bed. The nightstands are inspired by this picture that I shared of the bedroom inspiration. The nightstand are a perfect fit, although I liked a few others too. I will share the final look and how I made them next week b/c it is probably something you can do too! 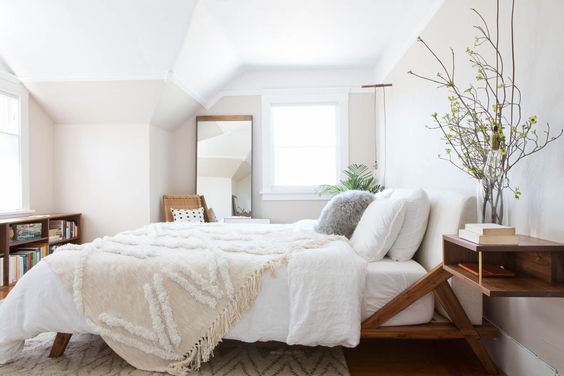 Here is proof that I was actually working during week 2 (haha!). I decided to use a lot of my wood scrap that I have left-over from woodworking to create custom walnut nightstands as seen in the inspiration photo above. Below, you can see the walnut hardwood that I glued-up using a 24" bar clamp, that comes in handy for anything from repairing chairs to adhering strips of hardwood. For this portion of the project, I had my walnut scrap cut into 14.5" and 25.5" lengths. I am saving the whole tutorial for next week, when I can finally share all of the details! DIY Walnut Nightstands Keep reading to see where we will place the nightstands and what other updates are in store for our bedroom. My goal is to create a California eclectic sanctuary through details such as artwork, paint(?) and accessories.
3 Comments
Botanical Dye and Aromatherapy Workshop Recap + Field NotesLast weekend, we hosted an awesome group of guests who discovered the power and possibility of plants working with all natural plant based dyes at our Botanical Dyeing and Aromatherapy workshop in Topanga. In this workshop, we experiment with natural dye on fiber while exploring aromatherapeutic blends. Everyone created something beautiful, and the art of botanical dyes intertwined perfectly with aromatherapy. All of the attention and energy that went into organizing the event paid off big when we saw the results on silk and smelled the beautiful aromatherapeutic blends. Be sure to scroll on down to see the marvelous results! 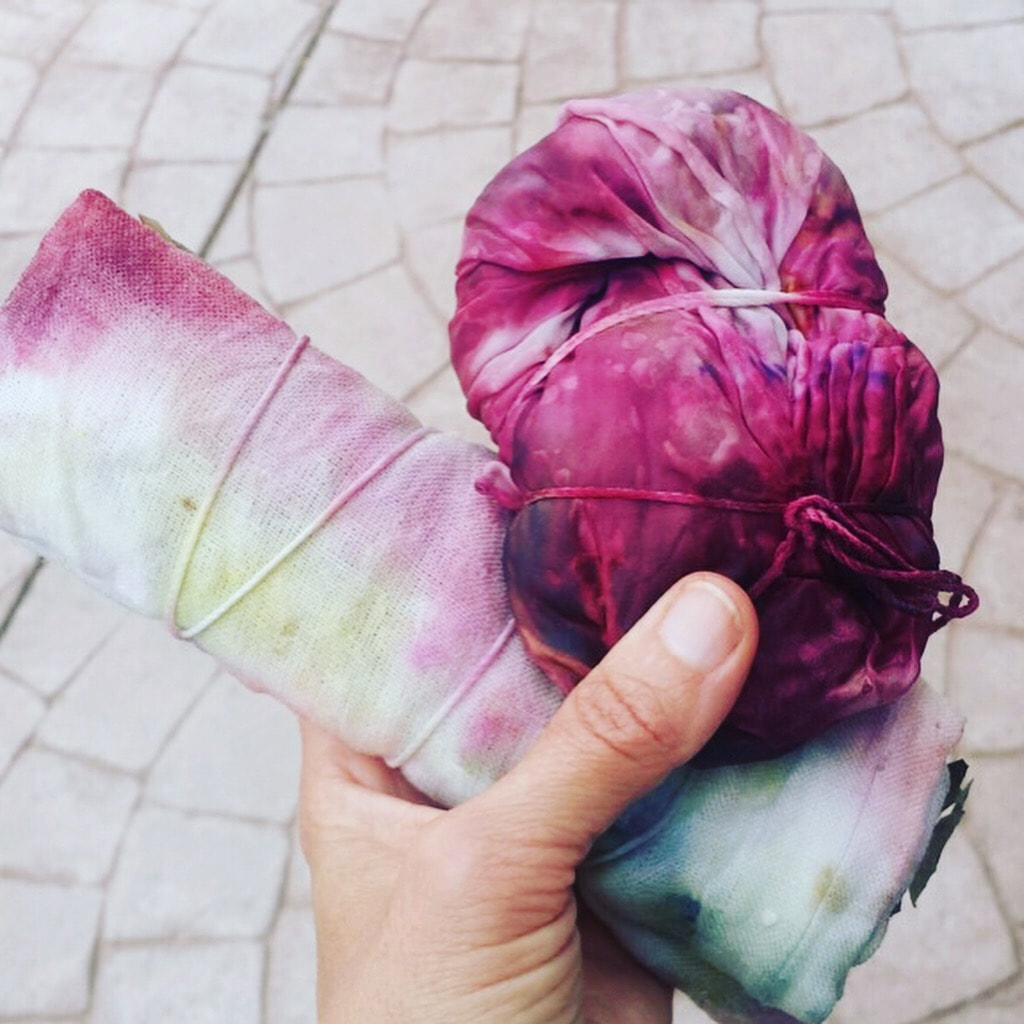 Today, I will share some pictures and inspiration from the day, so that you can learn more about the process, if you would like to try botanical dyeing at home. If you are considering attending a future event, then you can sign-up later in the post. The night before all of the silks were pre-soaked with alum, a mineral mordant then left to dry. 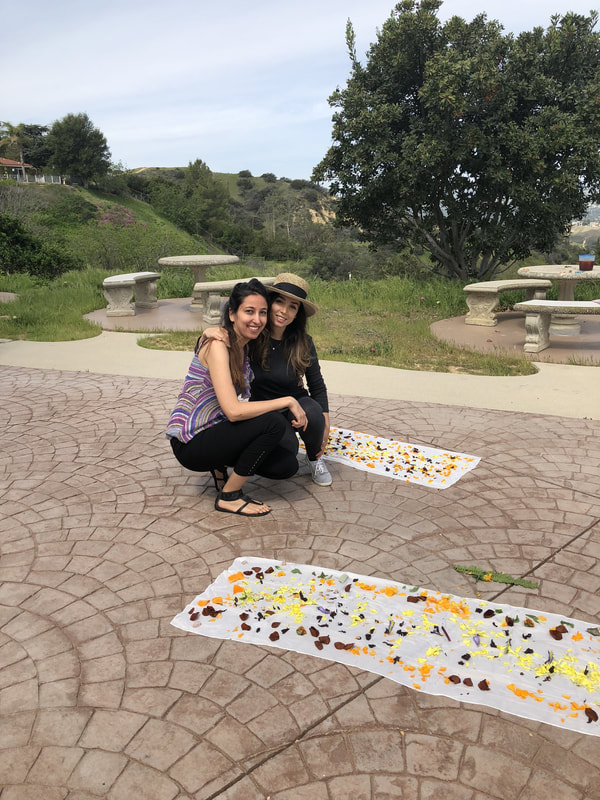 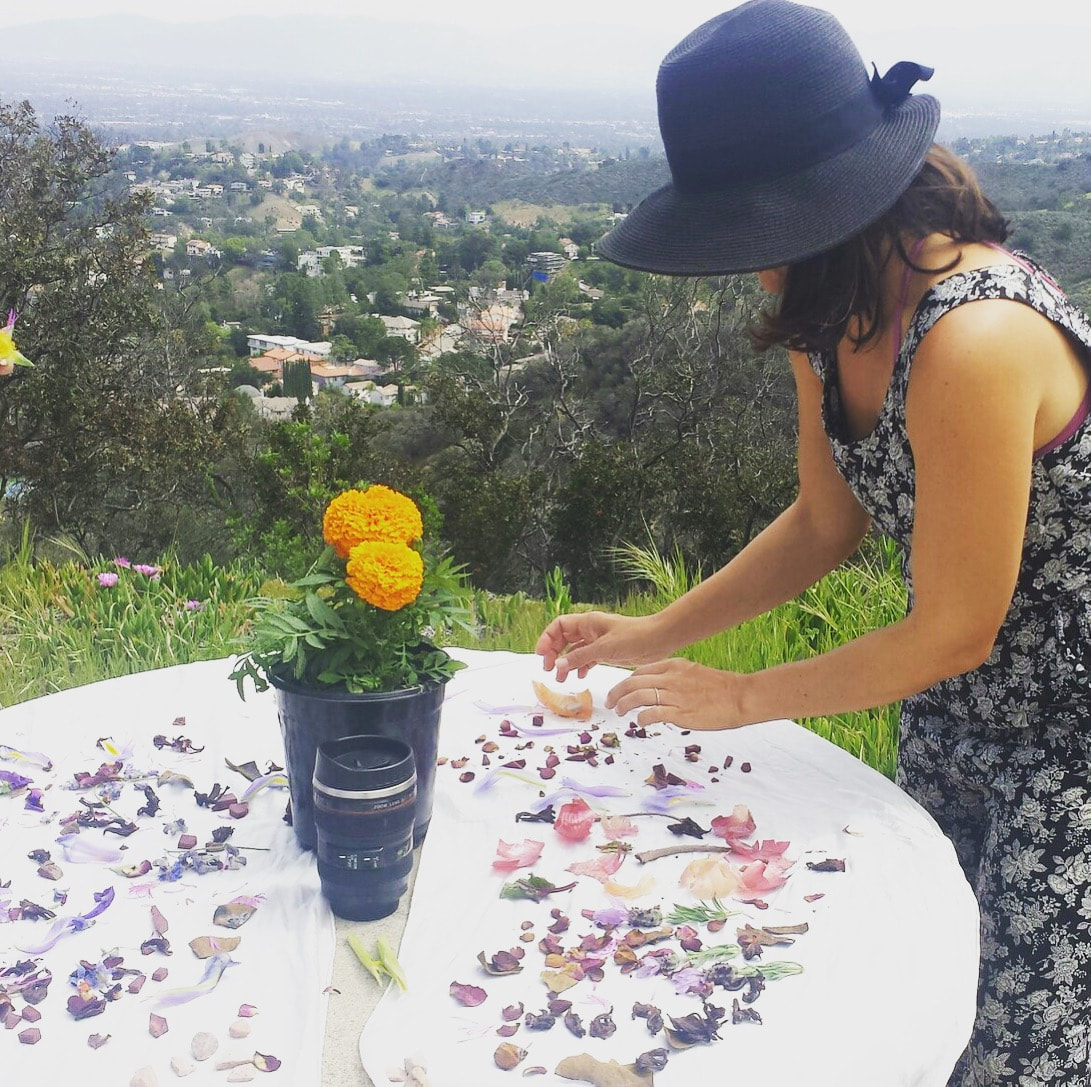 Guests laid out irises, hibiscus, dried rose petals, and onion skins in a random and creative fashion to be used as dye, then rolled and folded their silk bundles to steam in the kitchen. We secured them with twine. Some guests even applied some shibori-like folds to their bundles. While our botanical dye bundles were steaming, we were treated to some amazing Aromatherapy with Flin K. Grant.
ORC 2018: Designing a MAster Bedroom with a Laid Back styleIn my mind, I had BIG plans for this Spring. I had intended to fully renovate and update our rental property kitchen and dining room that we have in Kentucky. But then, 2 things happened. 1). I designed my first hand-dyed capsule pillow collection inspired by my work with Shibori and design 2). I literally just got back from a 20 day adventure across India and Japan, which I hope to share with you soon! I took a step back and realized that there simply was not enough time to tackle a full kitchen renovation (which would require more cross country travel and likely take weeks!l) First, I looked to a few places around the house that needed my attention. I love our bedroom. I love it's spaciousness and the view from our windows. So, I am jumping in here, fully jet lagged and ready to share with you Week 2 of our California Master Bedroom Design! Moreover, I'm hoping a streamlined space will provide me with a curated setting to photograph my hand-dyed pillow collection. I would love to share that process with you for anyone who like to hear tips about how to photo shoot bedding. I'm going to start by sharing inspiration. It is going to feel good to finally pull this room together through all of the beautiful details. 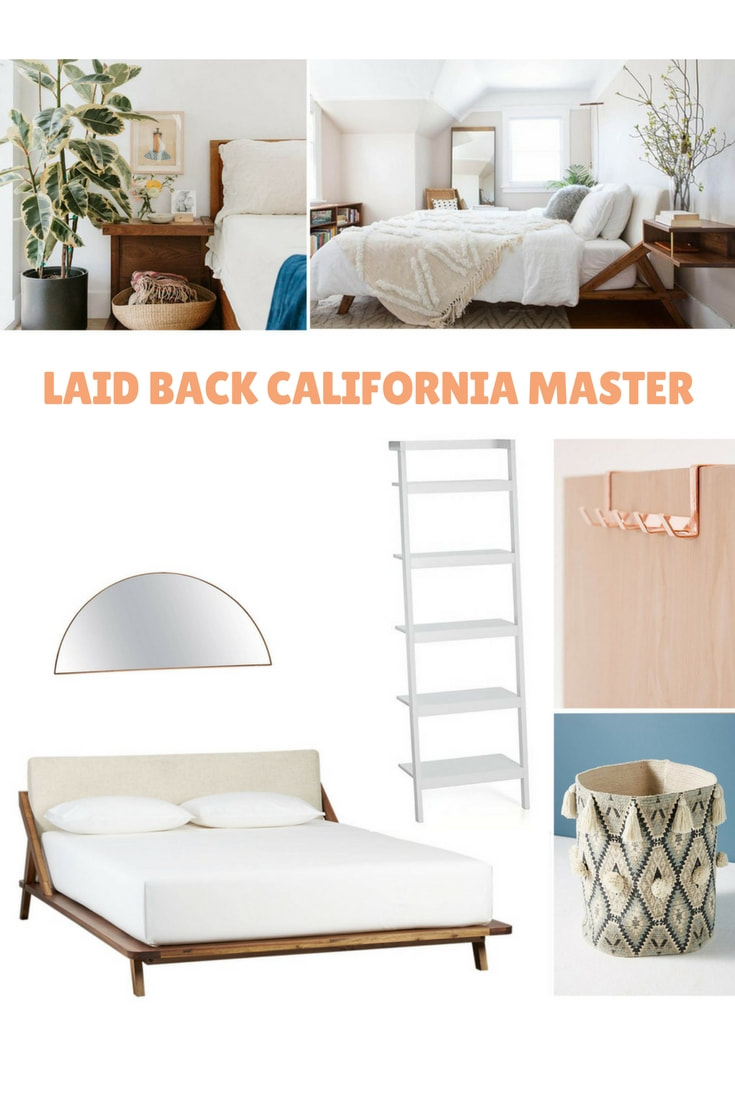 If you know me, you know that I am a big fan of California and mid-century minimal design. I love well designed products and I relish in the details of a space. I am hoping that by not taking on too much, I can really focus on bringing this room together through those products and details. We already have a few things that you will see in the before pictures. I share more plans and pictures in a few days!  Until then, if you would like to see the Boys Nature Bedroom that I designed last season, check these out!
|

HI, I'M HILARY.
This is where I share inspiration for creative well living & following your dreams. With a love to sustainable conscious creation. You will notice that I offer workshops that inspire you to LIVE a soul-inspired life and manifest your dreams. I hope to meet you at one of my retreats or inside one of my group programs. I truly believe in the power of community and connecting with visionary femme creatives like you! For weekly inspiration -find me on YouTube 


Categories
All
FAVORITES
Archives
September 2023

BLOG COURTESY:
All layouts on this blog are created solely for, A Day in the Life. I enjoy sharing information and love when others enjoy my ideas enough to post the links on their own sites. I simply ask that you credit photos and link back to all original posts. Any comments that are inappropriate or spam will be deleted. All other rights reserved. |


 RSS Feed