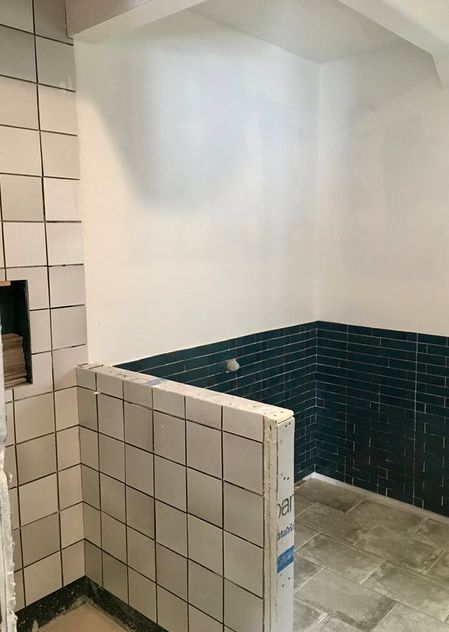
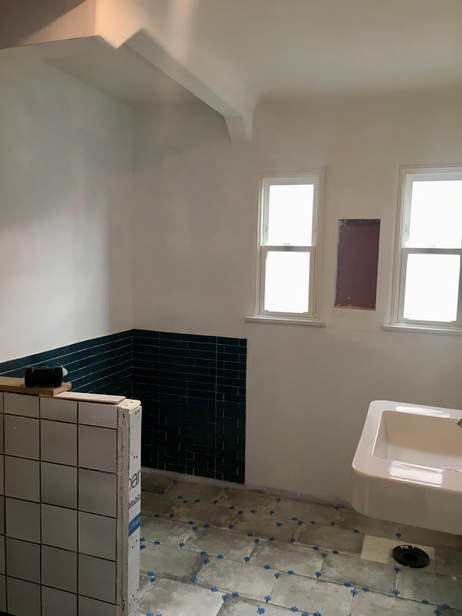
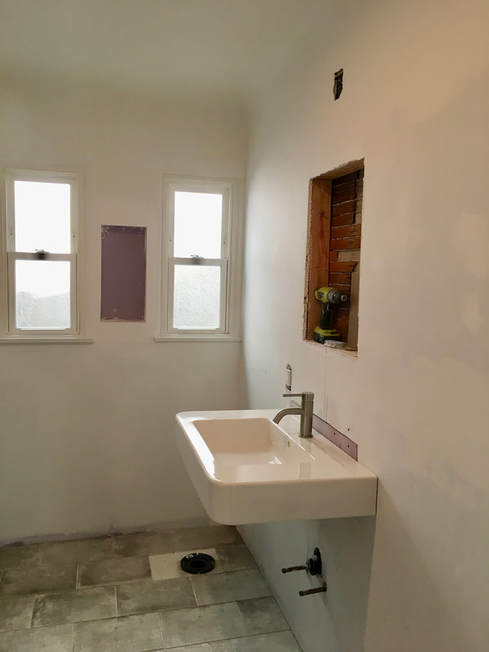
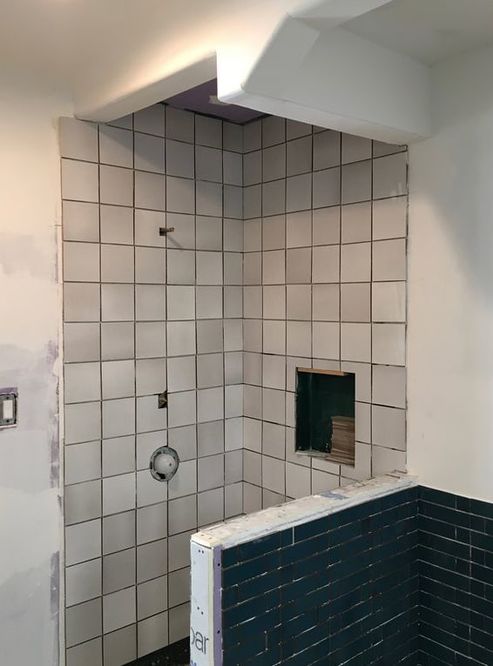
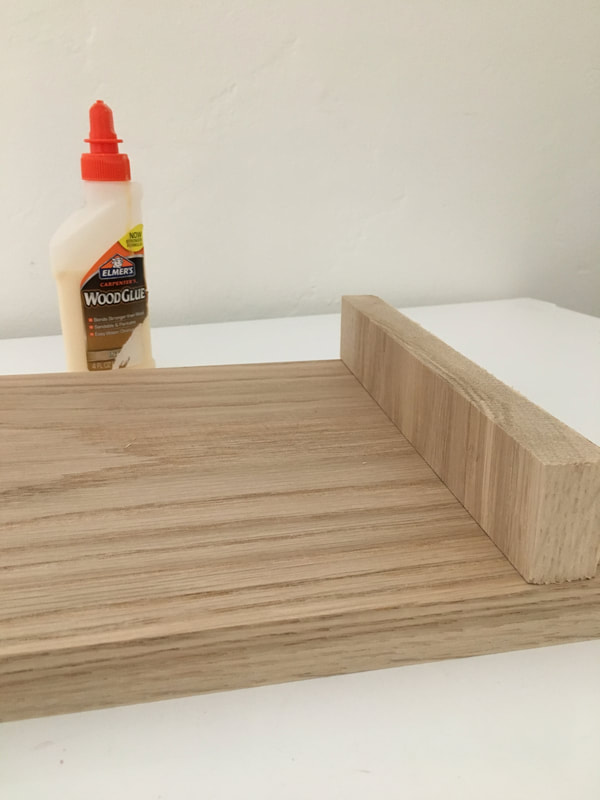
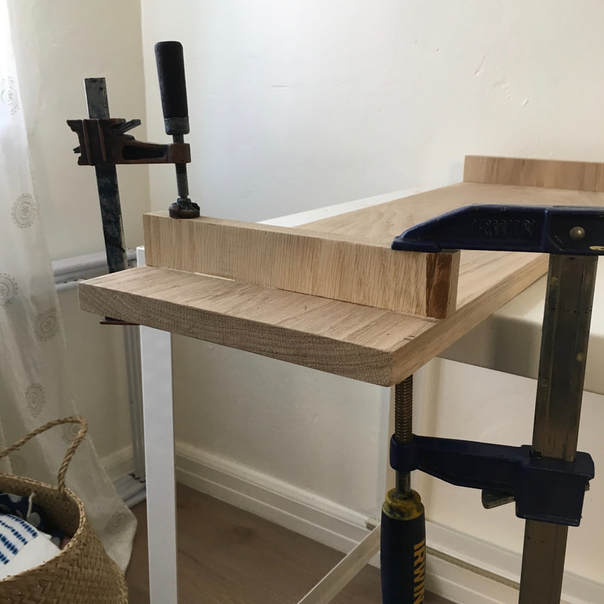
Main Spa Bath Caddy DIY + It all comes togetherWe are getting there, it is all coming together. I've made this my mantra for the week. Seriously;) if you can relate- just take a deep breathe and say it with me! But seriously, this week we made lots more progress on tiling and a bath caddy! In this post, I will share the modern look of Heath Ceramics Mid-century white square subway tile along with Island Blue, a new shade that is being developed at their factory laid in a stitch mosaic technique. If you read on down you will see how I made a simple bath caddy out of white oak for endless soaking and relaxing to come. When we started this challenge, I did not imagine that it would take us all 6 weeks to finish this space, especially since we are working with the help of a contractor and his team. I had visions of doing the photoshoot by Week 4 and having the room all tied up and styled with accessories by this week. Haha- not exactly what's happening! But we do have tile and sink progress. We installed our floating vanity sink. I was so happy to see this happen. It took some extra effort including my contractor installing a wooden support beam behind the wall, but it looks great! We decided to save on the sink vanity in lieu of buying a full vanity cabinet- the floating vanity also lends itself to the spa-like appeal. I will likely use a natural basket below the sink to hold any little items for our bathroom. Feeling relatively happy with the overall look. Also drumroll...we decided not to do polished concrete in the bath. I read too many articles online where homeowners complained of slipping. After considering that we plan to allow guests and our 4 year old to use this bathroom and he has the ability to splash large amounts of water onto the floor- it just seemed too risky. Instead we decided to do a concrete tile with some texture and have decided to do polished concrete in our upcoming guest house renovation- that will eventually one-day become my textile and design studio. It turns out, it will make much more sense out there in the garden. Another note on the tile- it was tricky to pull it all together- and I don't think we will fully see the look until all the light gray grout lines are in! Also wanted to show you the shower from this angle~ we really are almost there! I feel the most satisfied with the variation of each mid-century field tile, from white to light gray and I can't wait to see how it pops with the light gray grout lines! Which brings me to our bath caddy. I plan to do lots of soaking and lounging in our new freestanding tub, so I decided to design a custom bath caddy. It measures 30"w x 10"d. This depth will allows room to place books, soaps and a candle or tea without being too big. For this simple DIY project, I had the white oak cut to the following dimensions, 30" x 10" and also, 1.5" x 10" wood rests. Here you can see me doing the glue-ups in my studio below! After sanding down the wood with my orbital sander, I use a waterproof wood glue and 2 bar clamps while the glue sets up. Next week, I promise to show you the full oak caddy and how it rests on the tub. This week was just too crazy, and our tub is not even installed yet. So for this last week, a.k.a the countdown to the reveal, we have our checklist:
Just for kicks, if you'd like to see some more dramatic changes. You can look back at the bath during Week 1 of the challenge- it really was older Spanish bath that inspired us to take a fresh, modern and spa-like approach!
2 Comments
11/2/2018 08:19:05 am
Love your tiles mix and yay to planning ahead for all the extra storage everywhere! that floating sink ... i want it for myself and so jealous of the free standing tub!
Reply
11/8/2018 03:50:30 pm
Thanks, for stopping by Tim! I am loving the floating sink because it actually has a lot of space on the sides to place things, while I get ready.
Reply
Leave a Reply. |
HI, I'M HILARY.
This is where I share inspiration for creative well living & following your dreams. With a love to sustainable conscious creation. You will notice that I offer workshops that inspire you to LIVE a soul-inspired life and manifest your dreams. I hope to meet you at one of my retreats or inside one of my group programs. I truly believe in the power of community and connecting with visionary femme creatives like you! For weekly inspiration -find me on YouTube Categories
All
FAVORITES
Archives
September 2023
BLOG COURTESY:
All layouts on this blog are created solely for, A Day in the Life. I enjoy sharing information and love when others enjoy my ideas enough to post the links on their own sites. I simply ask that you credit photos and link back to all original posts. Any comments that are inappropriate or spam will be deleted. All other rights reserved. |









 RSS Feed
