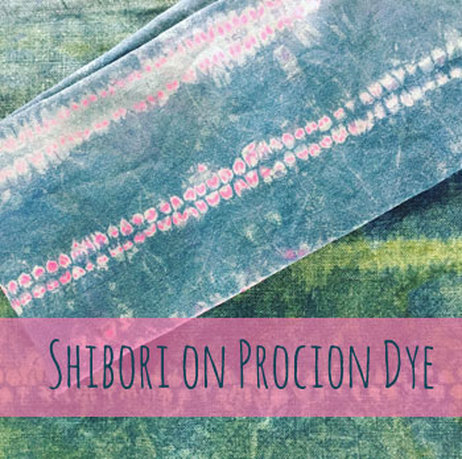
Shibori on Procion Dye: Part 1Lately, I have been enjoying experimenting with multiple Shibori techniques, while learning new ways to innovate within the medium. I recently purchased the book, Stitched Shibori: Technique, Innovation, Pattern and Design, which has opened my eyes to many possibilities and patterns that can be achieved through Shibori. Today, I would like to show you how to create stunning effects and pattern by using Shibori techniques on Procion dyes. As you may already know, Procion dyes are fiber reactive dyes that bind to cellulose or plant fibers. Although, I am mainly interested in ways to naturally dye fabric, I do appreciate the variety and effect that results when combining Procion and indigo together. For this project you will need:
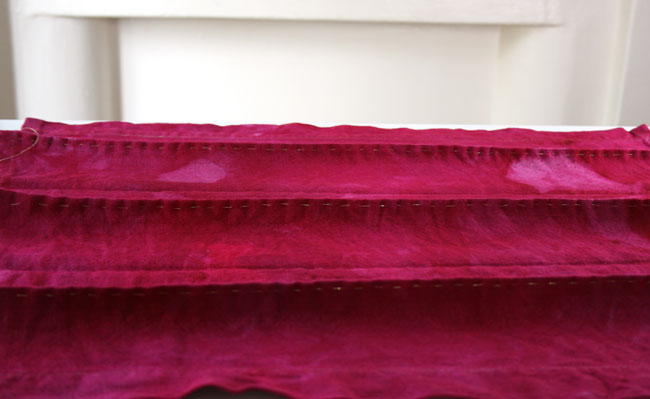
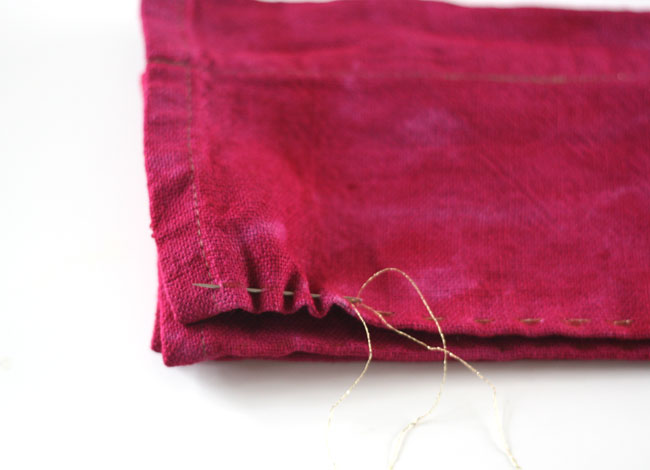
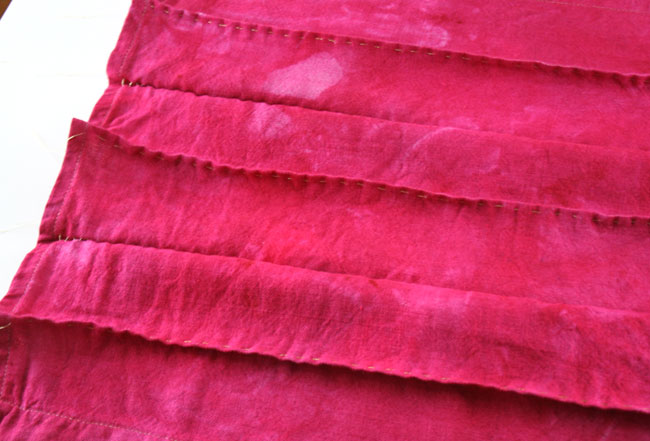
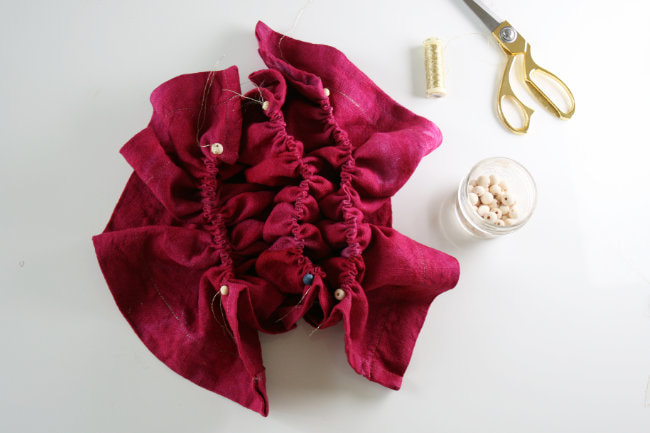
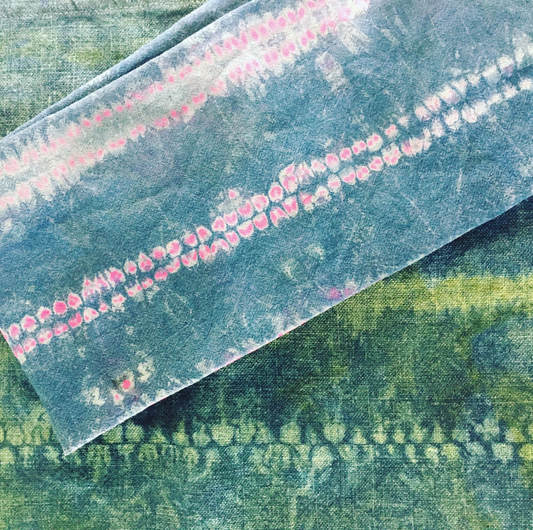
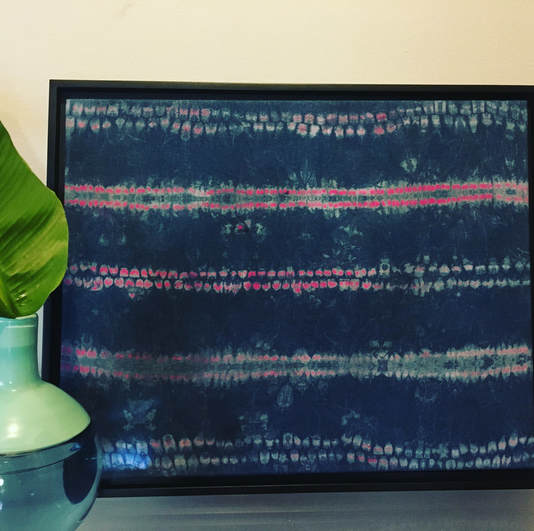
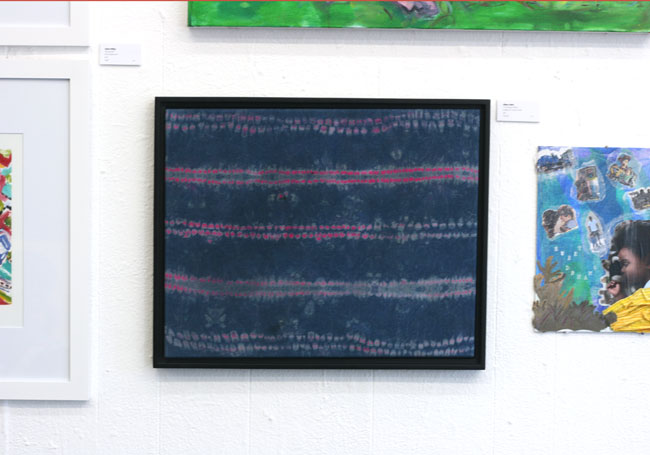
To begin, I decided to dye everything bright magenta pink using Procion cold water reactive dye. I wanted something that would contrast with the indigo and also shine through the stitching. For this project, I used a hand stitched Shibori technique called Hira-nui. I wanted to work with 1/4 stitches. For this, I marked the 1/4" stitches first on the pleats. For the pleats, I use an accordion fold technique, which you can see here. Receive my Shibori Supply Checklist to get started!Read more to see hira-nui stitching explained along with the steps used to achieve this fabulous technique. Here you can see the Hira-Nui technique using both 1/4" (5mm stitches). I use the longest needle in the pack so that I can do multiple stitches before pulling the needle through. I wanted to create a variety in the outcome after dyeing. I stitched the pleats that were standing up, and I stitched the opposite side of pleats that were on the reverse side facing down. I used a strong thread or double thread because one piece of my fabric was heavy weight. Below, you can see the wooden beads that I placed and used as stoppers at the ends of each pleat. Here is how the fabric looked all scrunched up. In the book, this is referred to as pulling up stitches. Once the fabric is tightly scrunched and secured it is ready to go into the indigo dye-bath. Those dye bath instructions are simple to follow and included in the mini dye-kit. Lately, I have been using the dye-kit in half, so that I can have 2 separate dye sessions, since it takes me several days to prepare the textiles for each dye-bath. Next, I over-dye the Procion using indigo for a unique effect! I love the Hira-nui technique on it's own, but I find it more visually interesting when the Procion dye shines through and the reaction creates a halo effect around each magenta spot. The fabric on top was a cotton cloth with a fairly tight weave. The fabric on the bottom was an upholstery weight fabric with a slightly more open weave. I found that a medium weight semi-closed weave cotton fabric works well for this over-dyeing technique. Please feel free to ask any specific questions about this process, if you have any! I would say this requires intermediate skill level to achieve and if you follow the directions closely, it can be done. Here is the piece below all framed up and ready for our home and my the faculty art show! ***Also, the link to the frame because a few people have asked me. I used a 16" x 20" floater frame. I had intended to have this professionally framed, but ended up doing it myself because I needed it in time for our faculty art show. I was impressed by the quality of the frame for this piece. I recently dyed some turquoise pieces in Procion that I plan to practice some stitched circles onto.
Hope you are having a great week.
0 Comments
Leave a Reply. |
HI, I'M HILARY.
This is where I share inspiration for creative well living & following your dreams. With a love to sustainable conscious creation. You will notice that I offer workshops that inspire you to LIVE a soul-inspired life and manifest your dreams. I hope to meet you at one of my retreats or inside one of my group programs. I truly believe in the power of community and connecting with visionary femme creatives like you! For weekly inspiration -find me on YouTube Categories
All
FAVORITES
Archives
September 2023
BLOG COURTESY:
All layouts on this blog are created solely for, A Day in the Life. I enjoy sharing information and love when others enjoy my ideas enough to post the links on their own sites. I simply ask that you credit photos and link back to all original posts. Any comments that are inappropriate or spam will be deleted. All other rights reserved. |









 RSS Feed
