|
Happy New Year, everybody! As we begin the year, I feel rested and excited about new projects that are unfolding. Although 2016 brought many challenges personally and professionally, it came with great successes as well. ***On a side note, if you would like to find out the winner of the original marbled art print, it will be announced at the bottom of this post, so read on down to find out who won!*** When 2016 began, I knew that I wanted to hone my craftsmanship as a product designer, so I continued developing my products and completed a woodworking class at Allied Woodshop. One thing, that I am the really proud of is the development of this website and blog, which began during the Summer of 2016 and sucessfully (finally!) launched it by the Fall of 2016. 3 things professional wins for were:
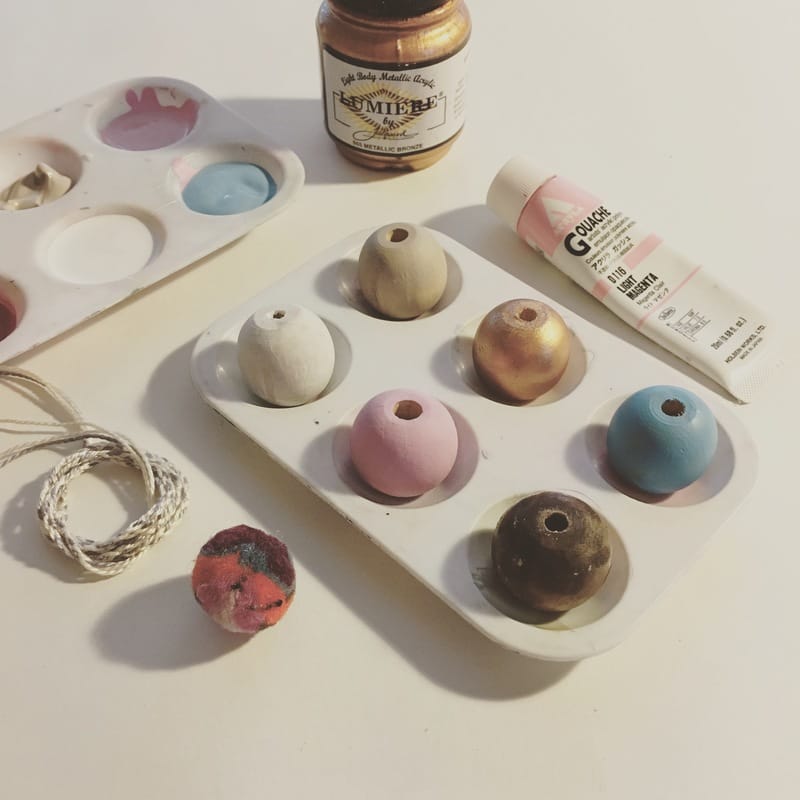
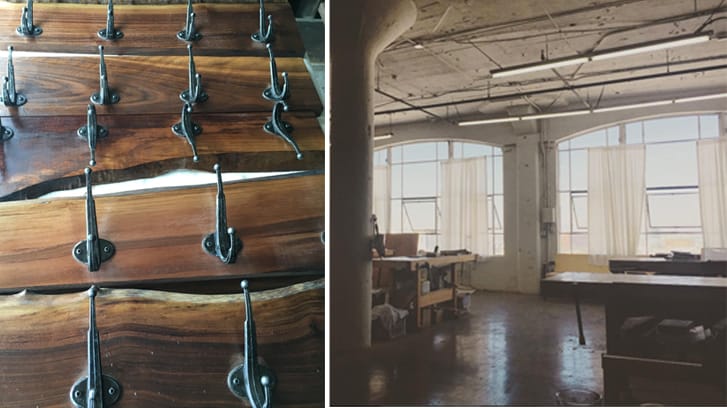 Handmade Walnut Coat Racks (left) and Woodworking Studio at Allied Woodshop (right) It is my hope that A Day in Life blog will be a resource to you, inspiring you to live creatively in 2017. In the weeks leading up to the New Year, I have been cleaning out my studio space in order to clear the path for both creativity and success. While cleaning up, look what I found! I came across these wooden beads that I had planned to use to make a new necklace. I like the smooth round shape of the beads and that they are made of wood. For this project, I wanted to destash my supplies, so I simply used up acrylic paint and gesso that I already had in studio. Here's how you can create a simple and modern beaded necklace for yourself or a friend. 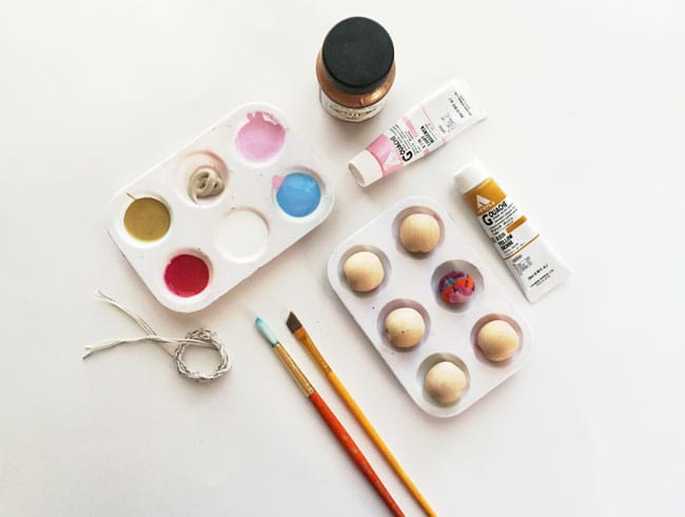 For this project, you will need:
 Once all of the beads were dry, I placed them in the order that I liked best. I braided 3 pieces of sil twine that I had on hand. This is how they looked all lined up. Overall, I am happy with the pastel palette that I used, although I would love to try this again with different color combinations, black and white, or neutral wood stains on wood beads might be nice too! I made sure to leave the twine long enough that I could slip it over my head so no clasp was necessary. 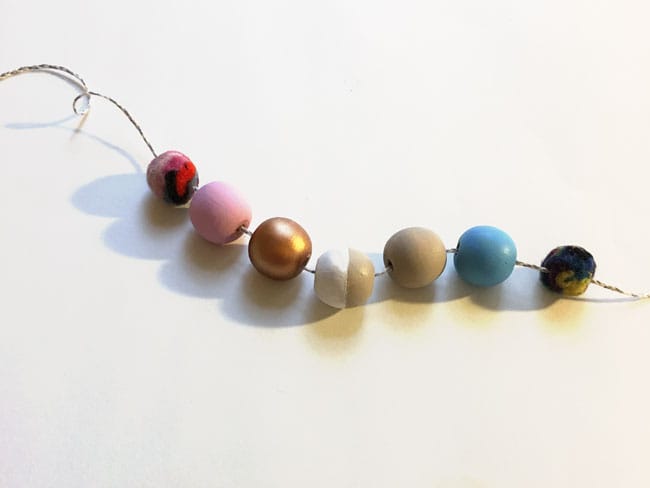 Now to announce the winner of the marbled art print giveaway. Thanks so much to all of the entrants who played along and made this giveaway a success. I loved reading your comments and I look forward to providing you quality handmade projects and more opportunities to win handmade prizes in 2017. 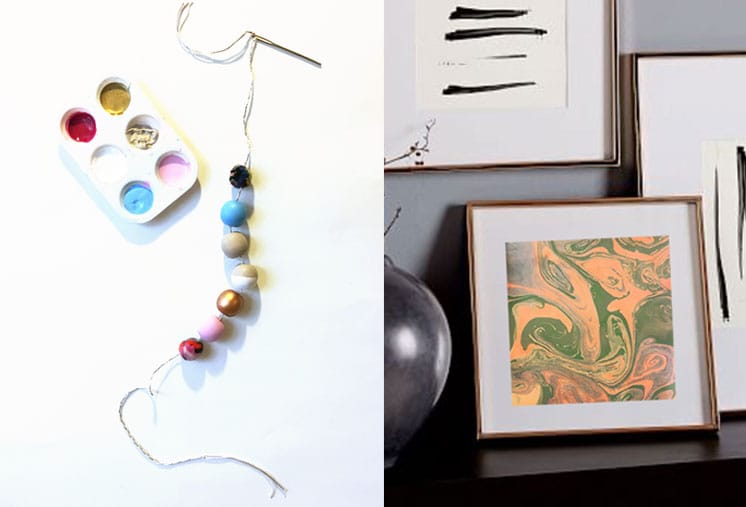 The winner was selectly randonmly by a randon number generator.
AND THE WINNER IS: Trinity Rosario. Trinity, I am so happy for you and I can't wait to see how you style your new frame in your home. I have a large scale marbled art print post coming soon, so stay tuned. Wishing you all artful Monday, as we enter 2017. Please share, what type of projects are you planning to take on this year? What do you want to create, personally or professionally in the New Year? I would love to hear from you.
0 Comments
Leave a Reply. |

HI, I'M HILARY.
This is where I share inspiration for creative well living & following your dreams. With a love to sustainable conscious creation. You will notice that I offer workshops that inspire you to LIVE a soul-inspired life and manifest your dreams. I hope to meet you at one of my retreats or inside one of my group programs. I truly believe in the power of community and connecting with visionary femme creatives like you! For weekly inspiration -find me on YouTube 


Categories
All
FAVORITES
Archives
September 2023

BLOG COURTESY:
All layouts on this blog are created solely for, A Day in the Life. I enjoy sharing information and love when others enjoy my ideas enough to post the links on their own sites. I simply ask that you credit photos and link back to all original posts. Any comments that are inappropriate or spam will be deleted. All other rights reserved. |


 RSS Feed