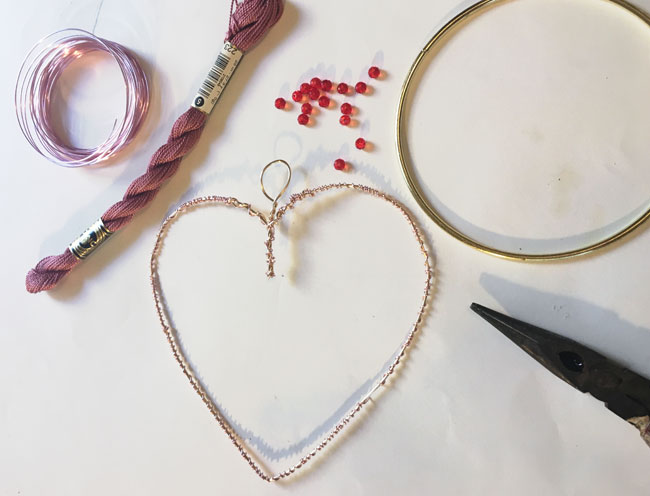
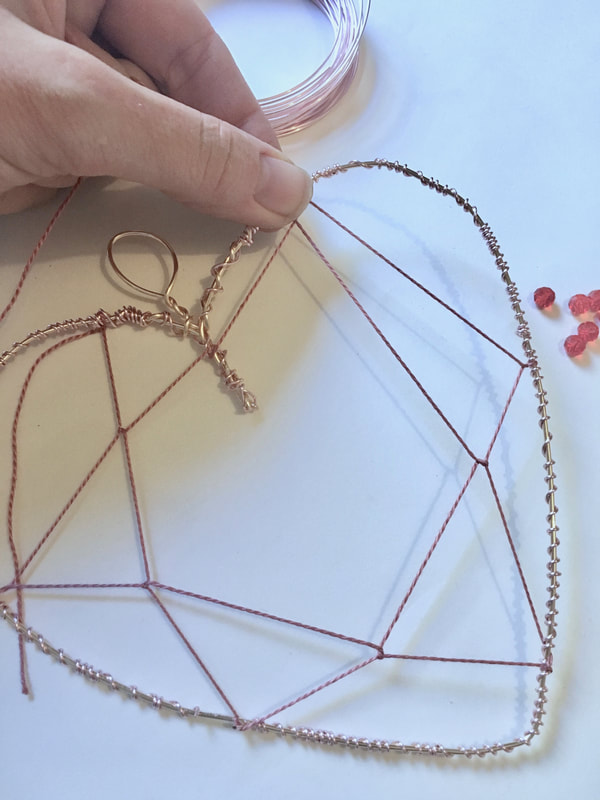
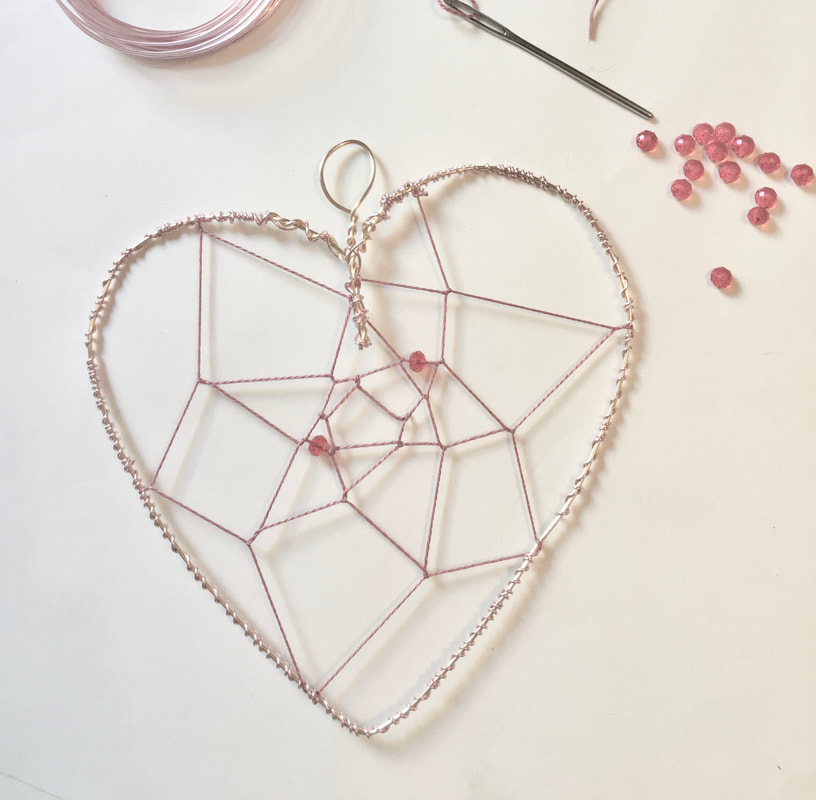
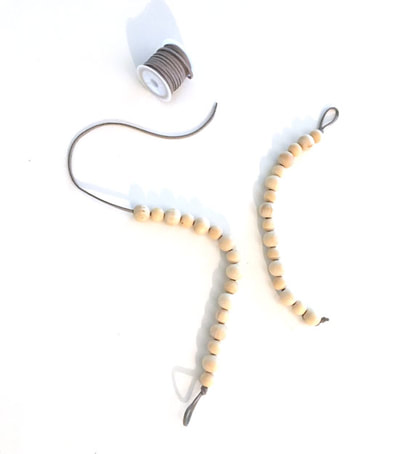
Valentine's DREAMCATCHERs At CAFAMToday, we visit my favorite L.A. museum, CAFAM and I show you how to make a unique heart-shaped dream catcher. While I love all of the art museums L.A. has to offer, the Getty, MOCA, and LACMA, it is CAFAM that holds a special place in my heart. CAFAM stands for the California of Folk Art Museum. It exhibits and showcases many modern and traditional crafts in a gallery setting. These crafts range from textiles, weaving, furniture making, book arts, printmaking and ceramics, so basically all of my faves. I especially love the functional finds that I come across in their gift shop. CAFAM offers community workshops and classes throughout the year and is situated directed across from LACMA. 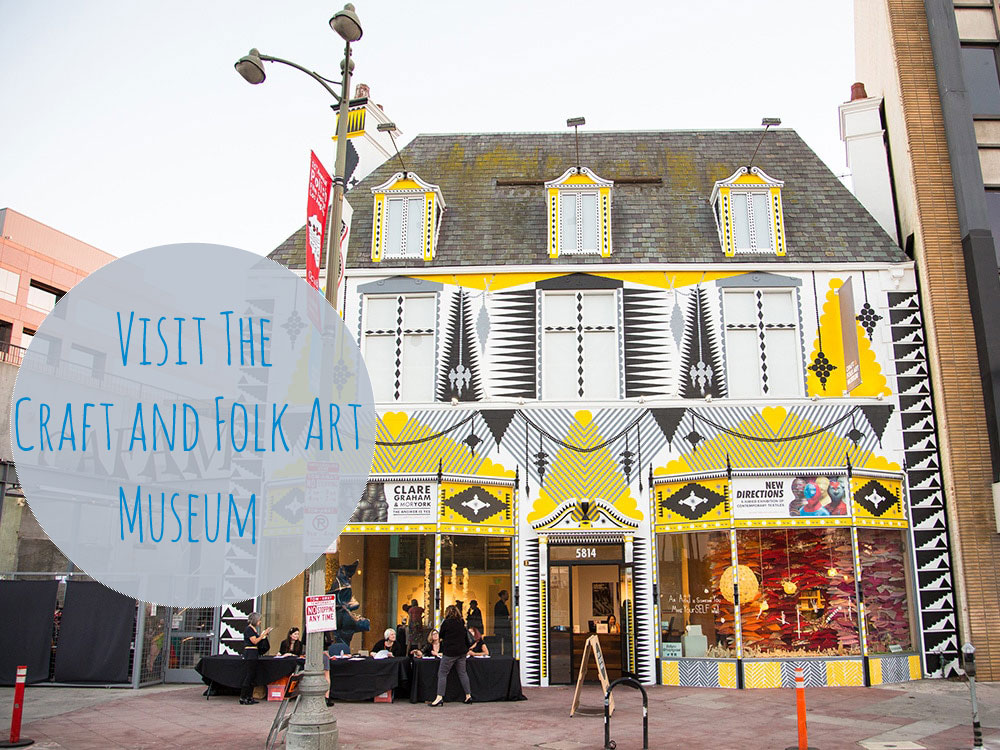 This Sunday, I learned how to make a heart-shaped dreamcatcher. I loved the idea to try out a heart-shaped dreamcatcher for an interior wall hanging. This workshop was led by weaver and fiber artist Mimi Haddon and is the third class that I have attended at CAFAM. List of SuppliesOnce I got home, I tweaked the project and list of supplies a bit to my liking. For this project, you will need: At the workshop, we used aluminum wire or a wire coat hanger. There are many possibilities for twisting and shaping the frame of the heart. To the right, you can see how I shaped a wire heart using gold and rose gold wire. I began by using the thicker gold wire and wrapped the rose gold around it, so that the heart shape will be grooved and those little grooves will catch the thread as you loop the embroidery thread. Below, you can see how I loop the embroidery thread around the outside of the frame gradually working my way in to the center. I have made a round dreamcatcher using a similar technique. 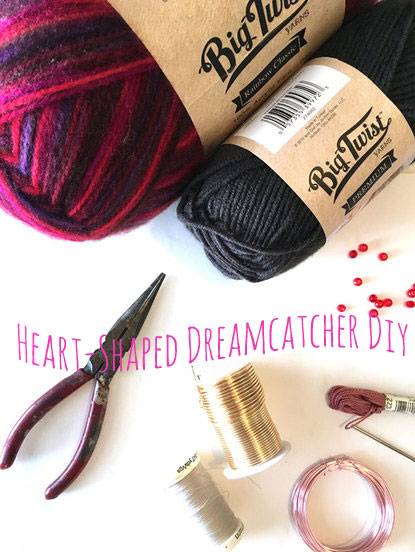 I found and old book, and wove inspirational quotes in to the dream catcher. 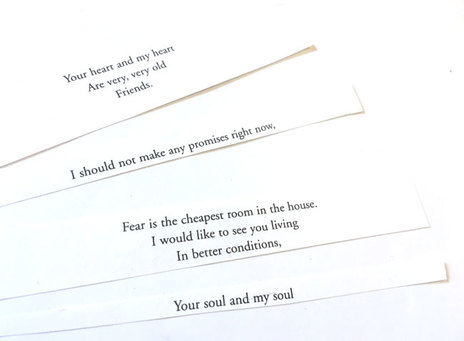 Next, I wanted to add fringe to the bottom of the heart. I cut several pieces of yarn the same length, then I folded them in half. I looped the yarn around the wire using larch knots. 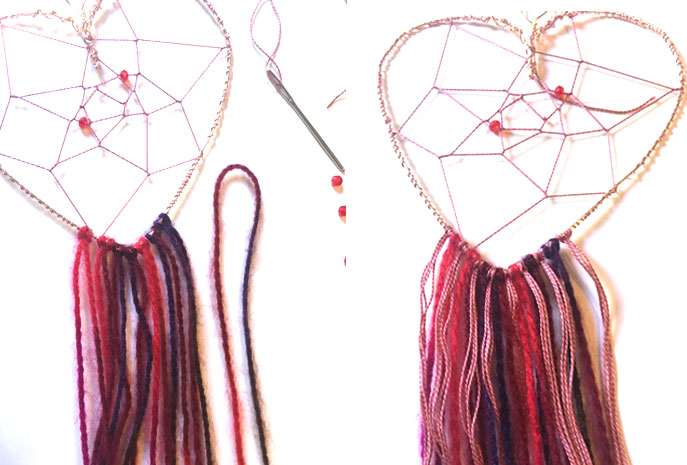 Round Dreamcatcher on an Embroidery ringLater, I made a second dreamcatcher using small gold macrame ring that I had in my studio. I followed a similar pattern with the ring. I wrapped it in rose gold wire in order to create grooves to catch the thread. Then, I visualized an inner heart shape that would be suspended by the thread. 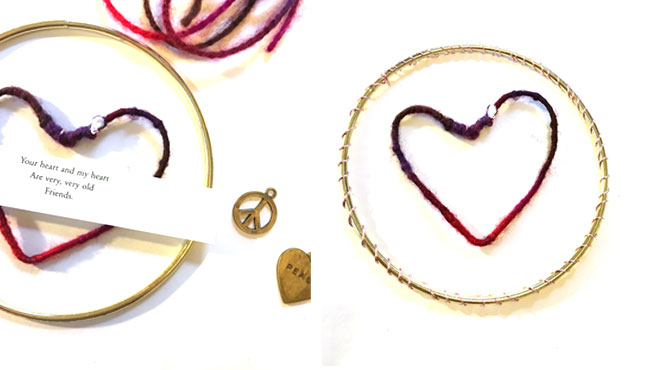 I left the heart slightly asymmetric to add handmade charm. Then, I wrapped it with yarn doing a macrame knot every few inches or so to keep the yarn from slipping. 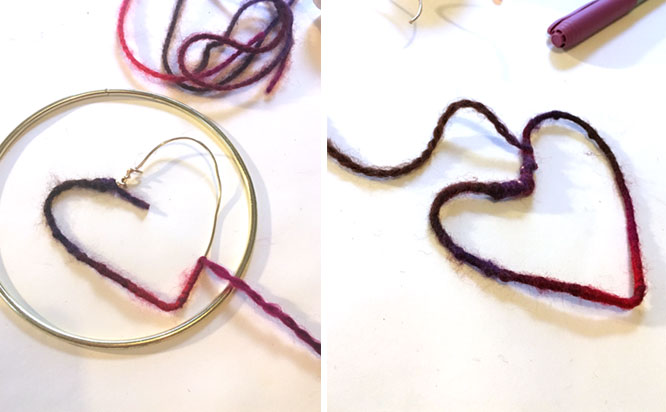 Later, I added the red glass beads and the thread. You could also add natural crystals or gemstones to your weavings. 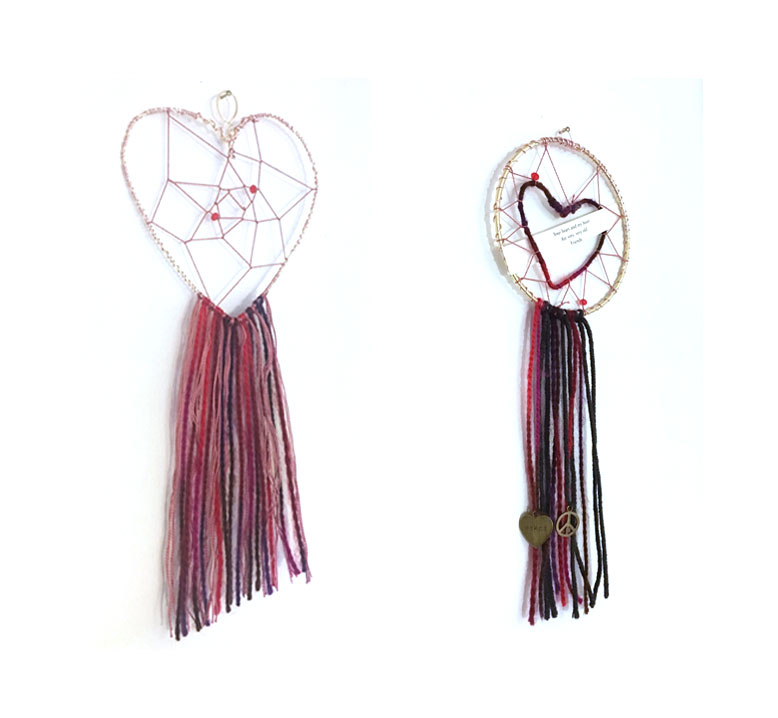 I could picture these in a variety of spaces from kid's rooms to vignettes and shelfies. I hope to make larger interior wall hangings with you soon. If you try out this project, I would be honored if you would tag me in your creations on Instagram so that I can see them! If you liked this post, then you may like these other ideas for your handmade home.
0 Comments
Leave a Reply. |

HI, I'M HILARY.
This is where I share inspiration for creative well living & following your dreams. With a love to sustainable conscious creation. You will notice that I offer workshops that inspire you to LIVE a soul-inspired life and manifest your dreams. I hope to meet you at one of my retreats or inside one of my group programs. I truly believe in the power of community and connecting with visionary femme creatives like you! For weekly inspiration -find me on YouTube 


Categories
All
FAVORITES
Archives
September 2023

BLOG COURTESY:
All layouts on this blog are created solely for, A Day in the Life. I enjoy sharing information and love when others enjoy my ideas enough to post the links on their own sites. I simply ask that you credit photos and link back to all original posts. Any comments that are inappropriate or spam will be deleted. All other rights reserved. |


 RSS Feed